Version: Yurbi v11
Role: Agent and higher
Permission:  Agent with view permission to the report or dashboard
Accessing the Report
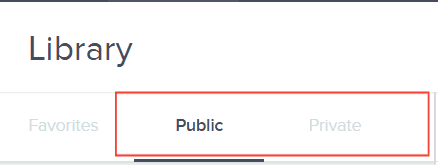
Click on the Library button, which is found next to the Home button.

Choose between the Public or Private subsection.
Select the folder where the report or dashboard is nestled in
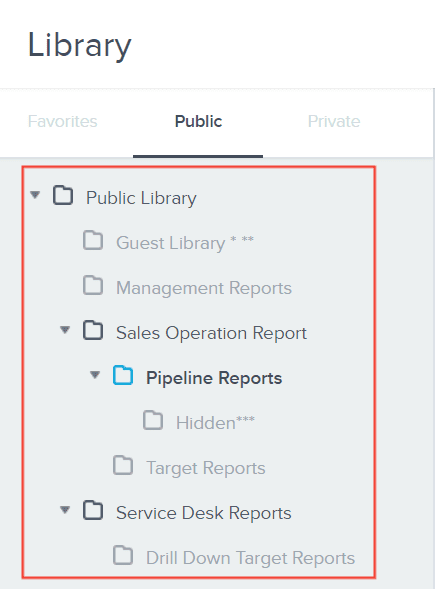
Locate the reports or dashboards you wish to export.

Sending via Run
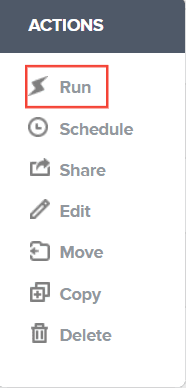
Here is the 1st method to use when sending a report or dashboard via email. We use the Run option found in the action menu.
Click the down arrow at the end of a report.

Select Run
Click on the Export icon

Select a format, then choose Export in Email.
 ">
"> Here is an in-depth article about exporting a report or dashboard
Sending via Schedule
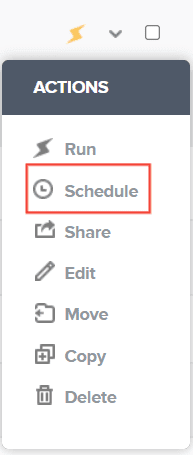
Here is the 2nd method to use when sending a report or dashboard via email. We use the Schedule option found in the action menu
Click the down arrow at the end of a report.

Click Schedule from the action menu
Here is an in-depth article about scheduling a report or dashboard
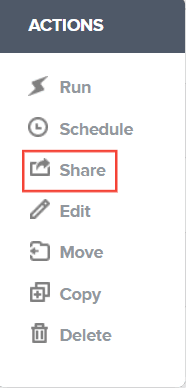
Sending via Share
Here is the 3rd method to use when sending a report or dashboard via email. We use the Share option found in the action menu.
Click the down arrow at the end of a report.

Click Share from the action menu
Select Schedule
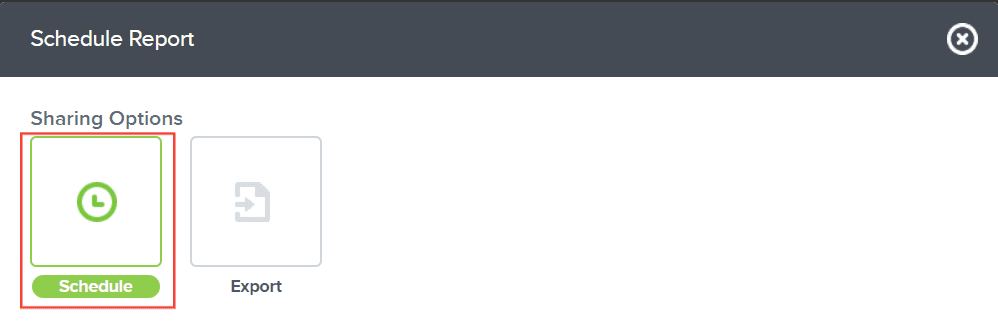
Here is an in-depth article about scheduling a report or dashboard
Or, Select Export
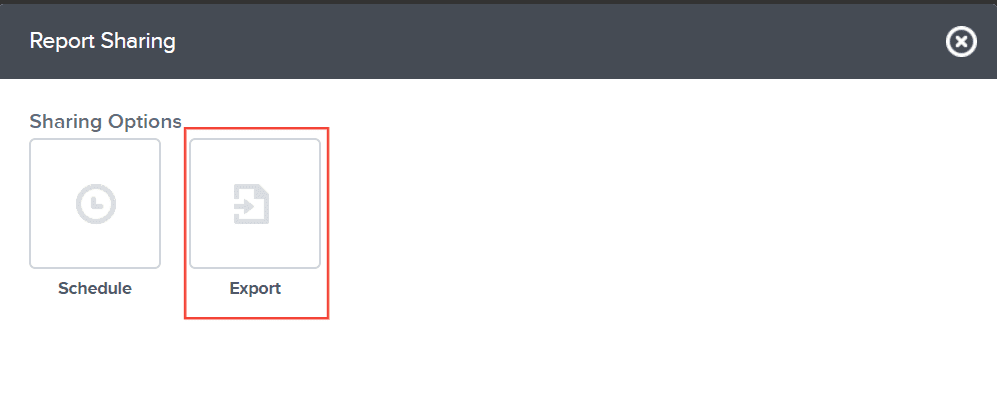
Select a format, then choose Export in Email.
 ">
">Here is an in-depth article about exporting a report or dashboard
Managing Scheduled Reports
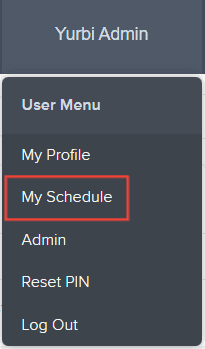
To manage scheduled report, locate the User Menu found on the upper right beside the help icon.

Follow the steps under this article to be able to edit your scheduled report
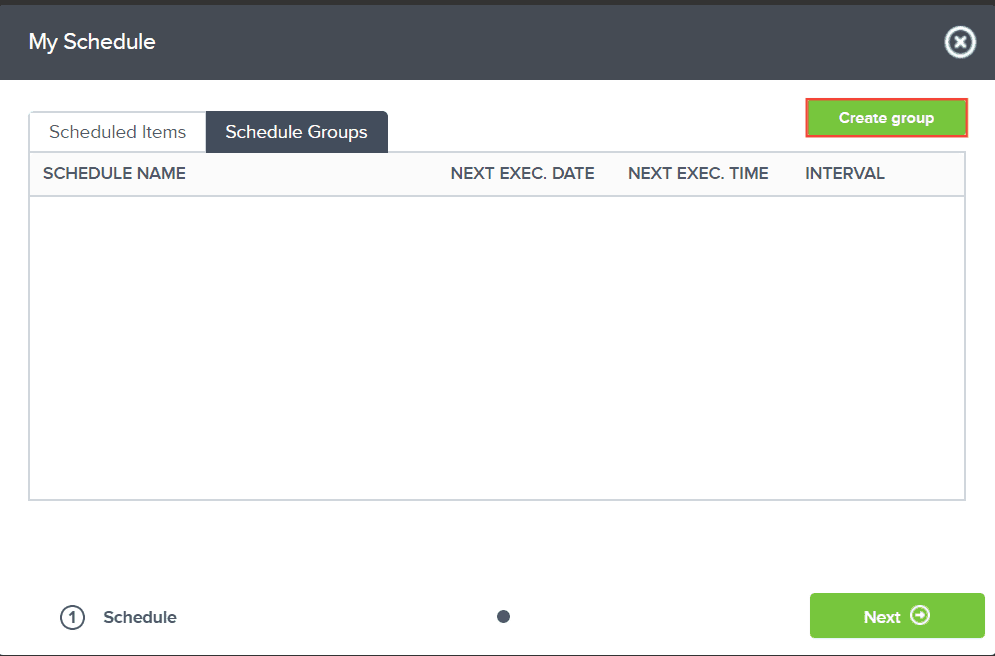
Configuring Schedule Groups
To access this, locate the User Menu found on the upper right beside the help icon.

Select My Schedule
Click Schedule Group

Click Create Group
Type in Schedule Group Name
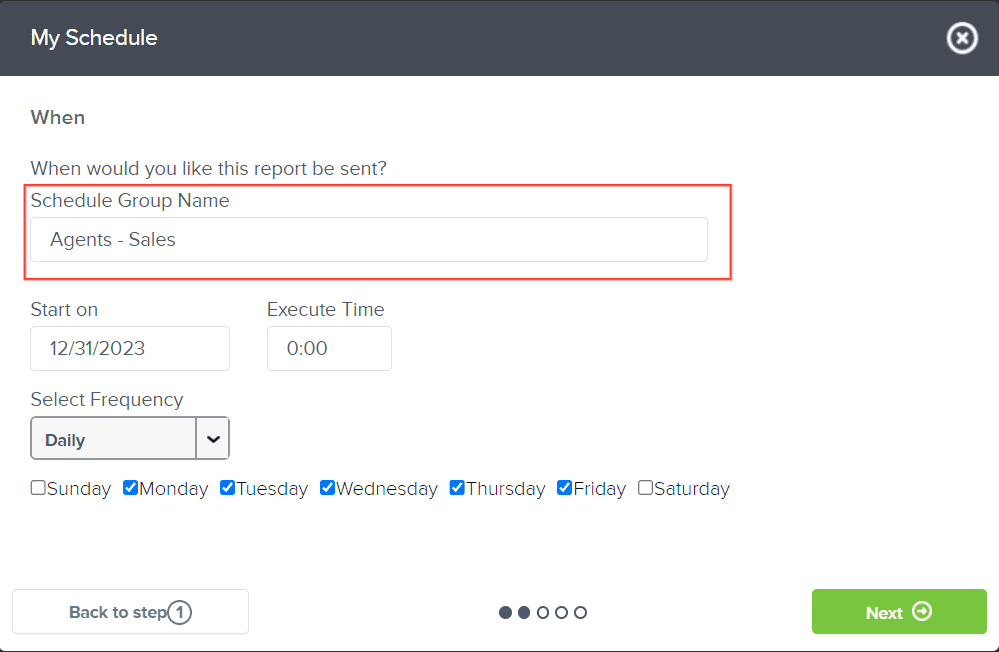
Configure the start on date, execution time and frequency of the scheduled group.
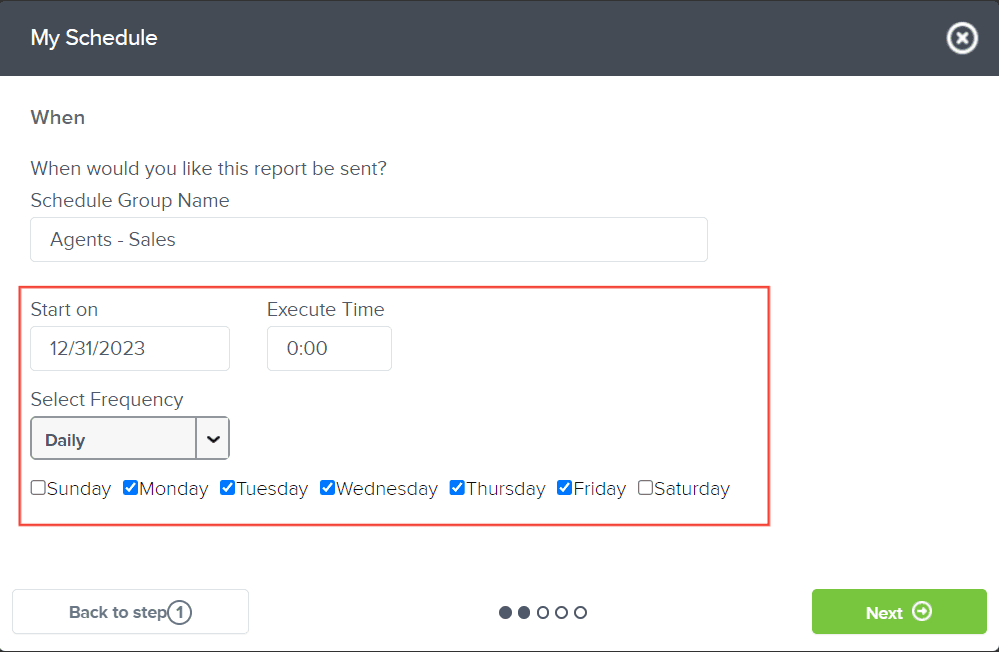
Click Next

Select your recipients.
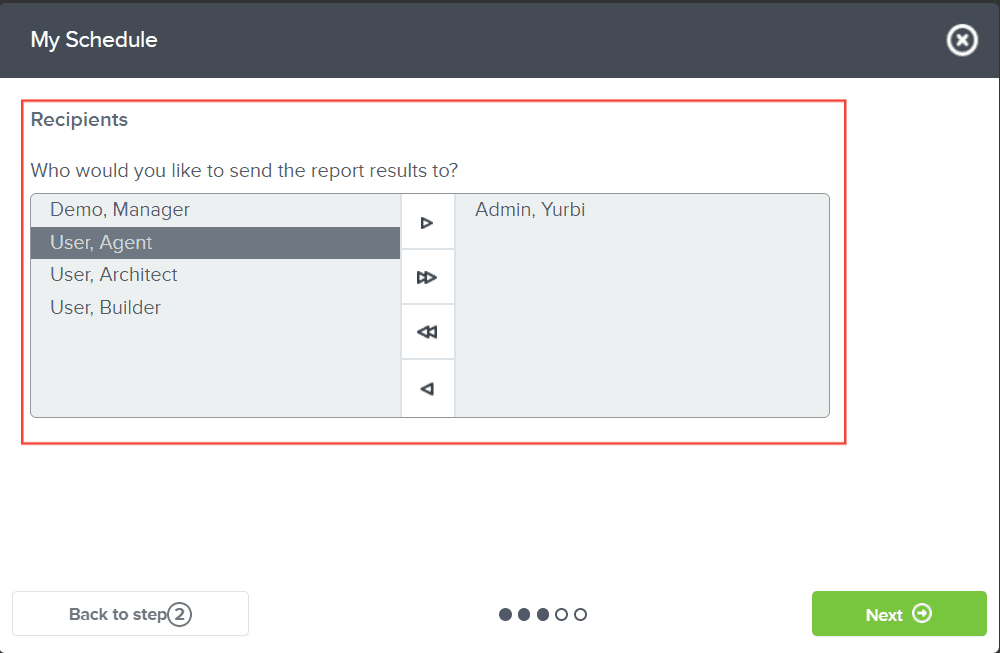
To add a recipient, select them from the left panel and then click the right arrow. This will move them to the right panel and add them to receive the scheduled item.


To remove a recipient, select them from the right panel and click the left arrow. They'll be moved back to the left panel, effectively removing them from the recipients list.


Click Next

Type in an Email Subject and Body
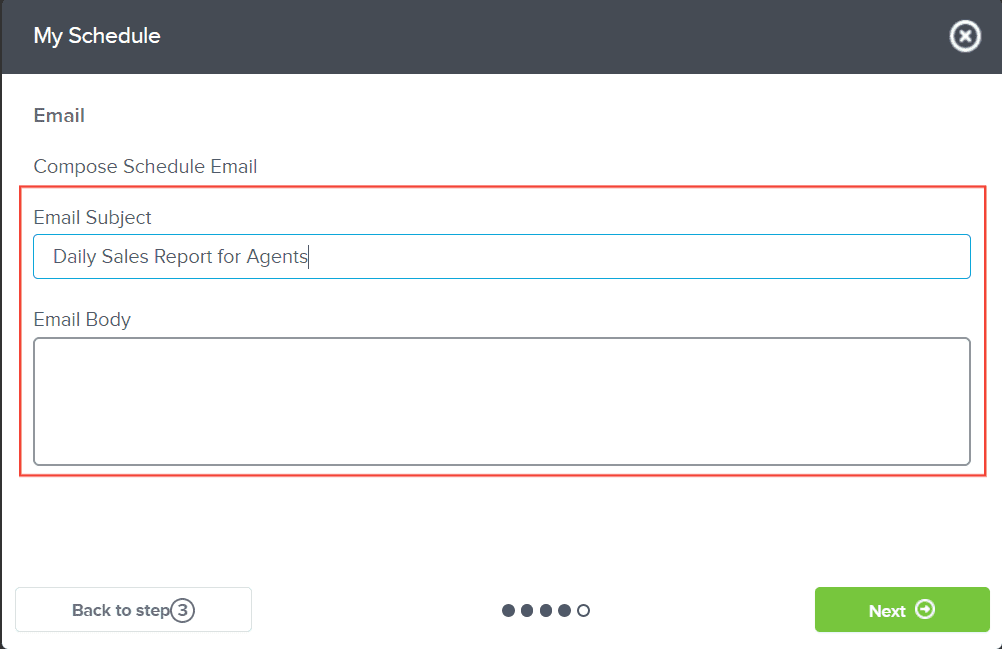
Click Next

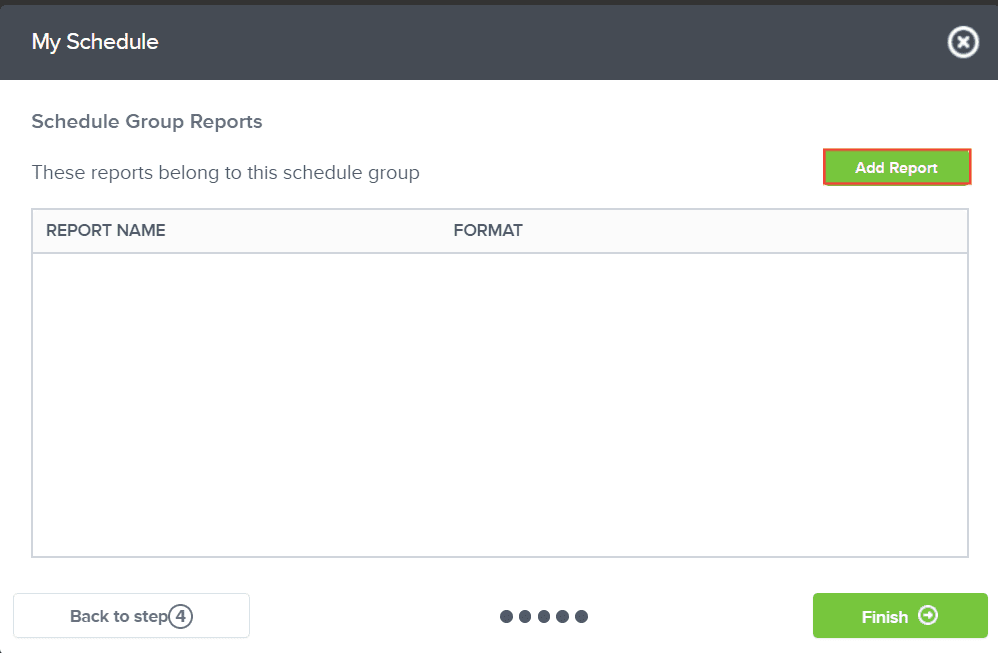
Click Add Report
Select the folder where the report or dashboard you want to schedule is nestled in.

Click on the report once located.
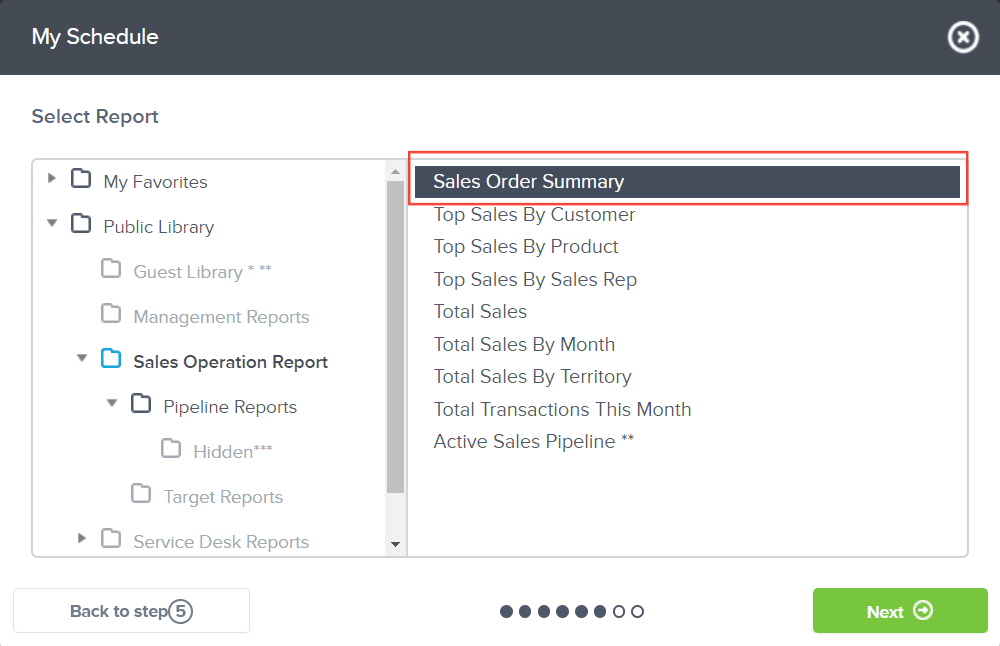
Click Next

Select your format and configure the file name, if needed.
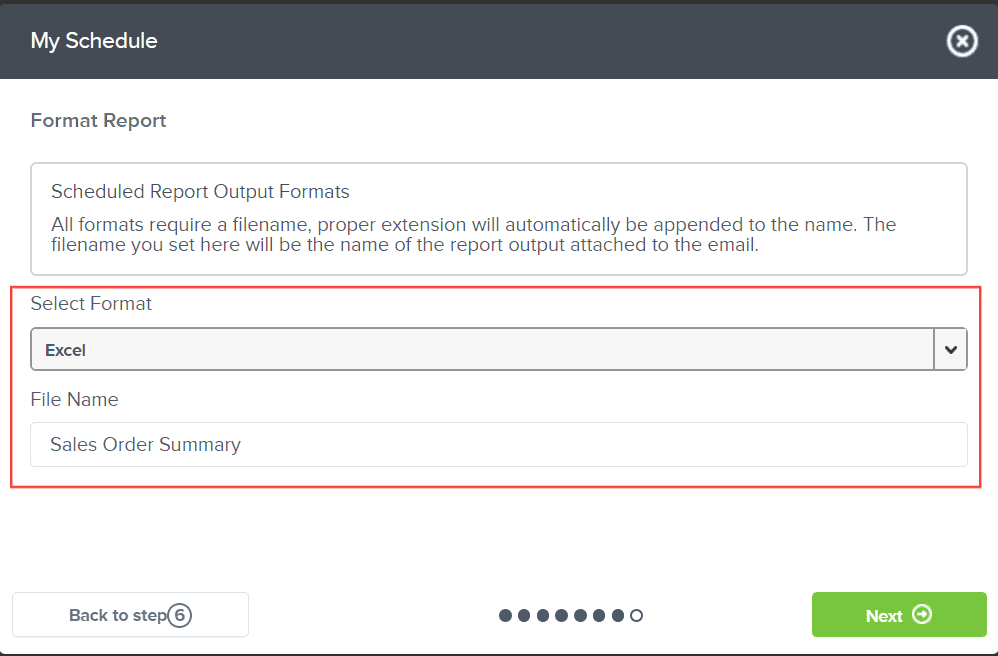
Click Next

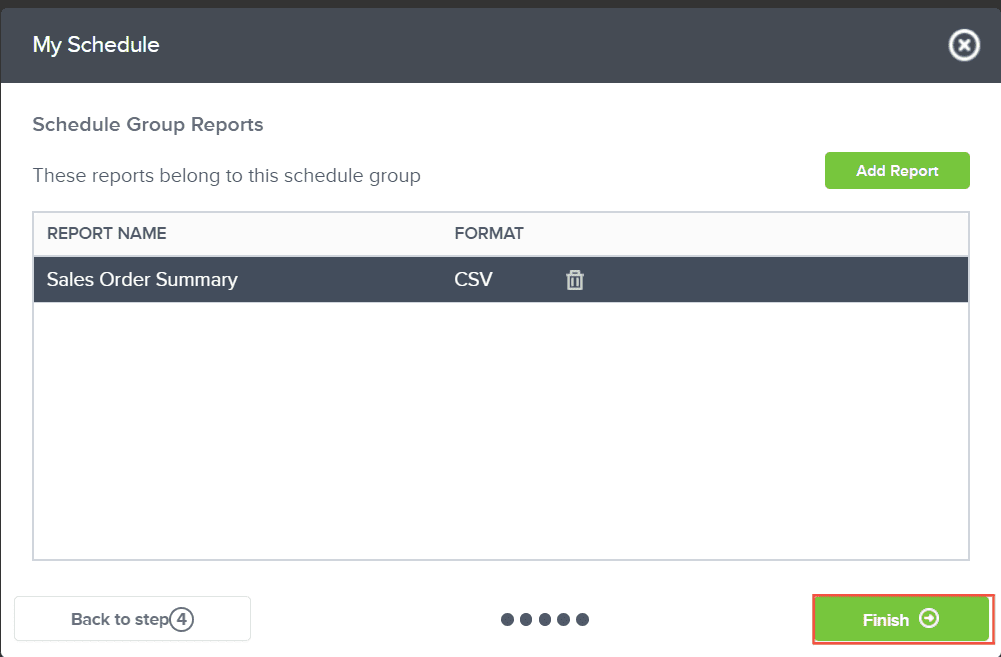
Preview your report and click Add

Click Finish to finalize the Scheduled Group Report
Look at the Scheduled Groups to see if the group you’ve
added appear.
And there you have it! You now know how to send a report or dashboard via email using three methods!