Version: Yurbi v11 or higher
Role: You must have root privileges or be a root-equivalent user to perform this installation.
Supported Versions:
Ubuntu 20.04, 22.04, 24.04
Debian 11, 12
Fedora 38,39,40
Redhat 9
Rocky Linux 9
CentOS 9
Amazon Linux 2023
Oracle 9
In this article, we will provide the steps to install Yurbi on supported versions of Linux. To begin the installation, SSH to a root or root-level user and follow these steps. This document covers installation using the embedded PostgreSQL backend database for Yurbi. If you wish to install and use an existing MS SQL Server as the backend database, please follow this article.
After the installation, we will guide you through activating the trial license of Yurbi and optionally configuring Yurbi to leverage HTTPS and an SSL certificate, if desired.
Getting Started
To start, SSH to your Ubuntu server as root or a root-level user.
ssh root@your-server-ip
Follow the steps below to complete the installation.
Step 1: Run the Installation Command
To install Yurbi, execute the following command in your terminal:
curl -s https://f002.backblazeb2.com/file/5000fish/yurbi/linux/install.sh | sudo bash
This command will download and run the Yurbi installation script. If you encounter an error indicating that your version is not supported, refer to the list of supported Linux versions above. For assistance with a specific distribution or version, please contact support@yurbi.com.
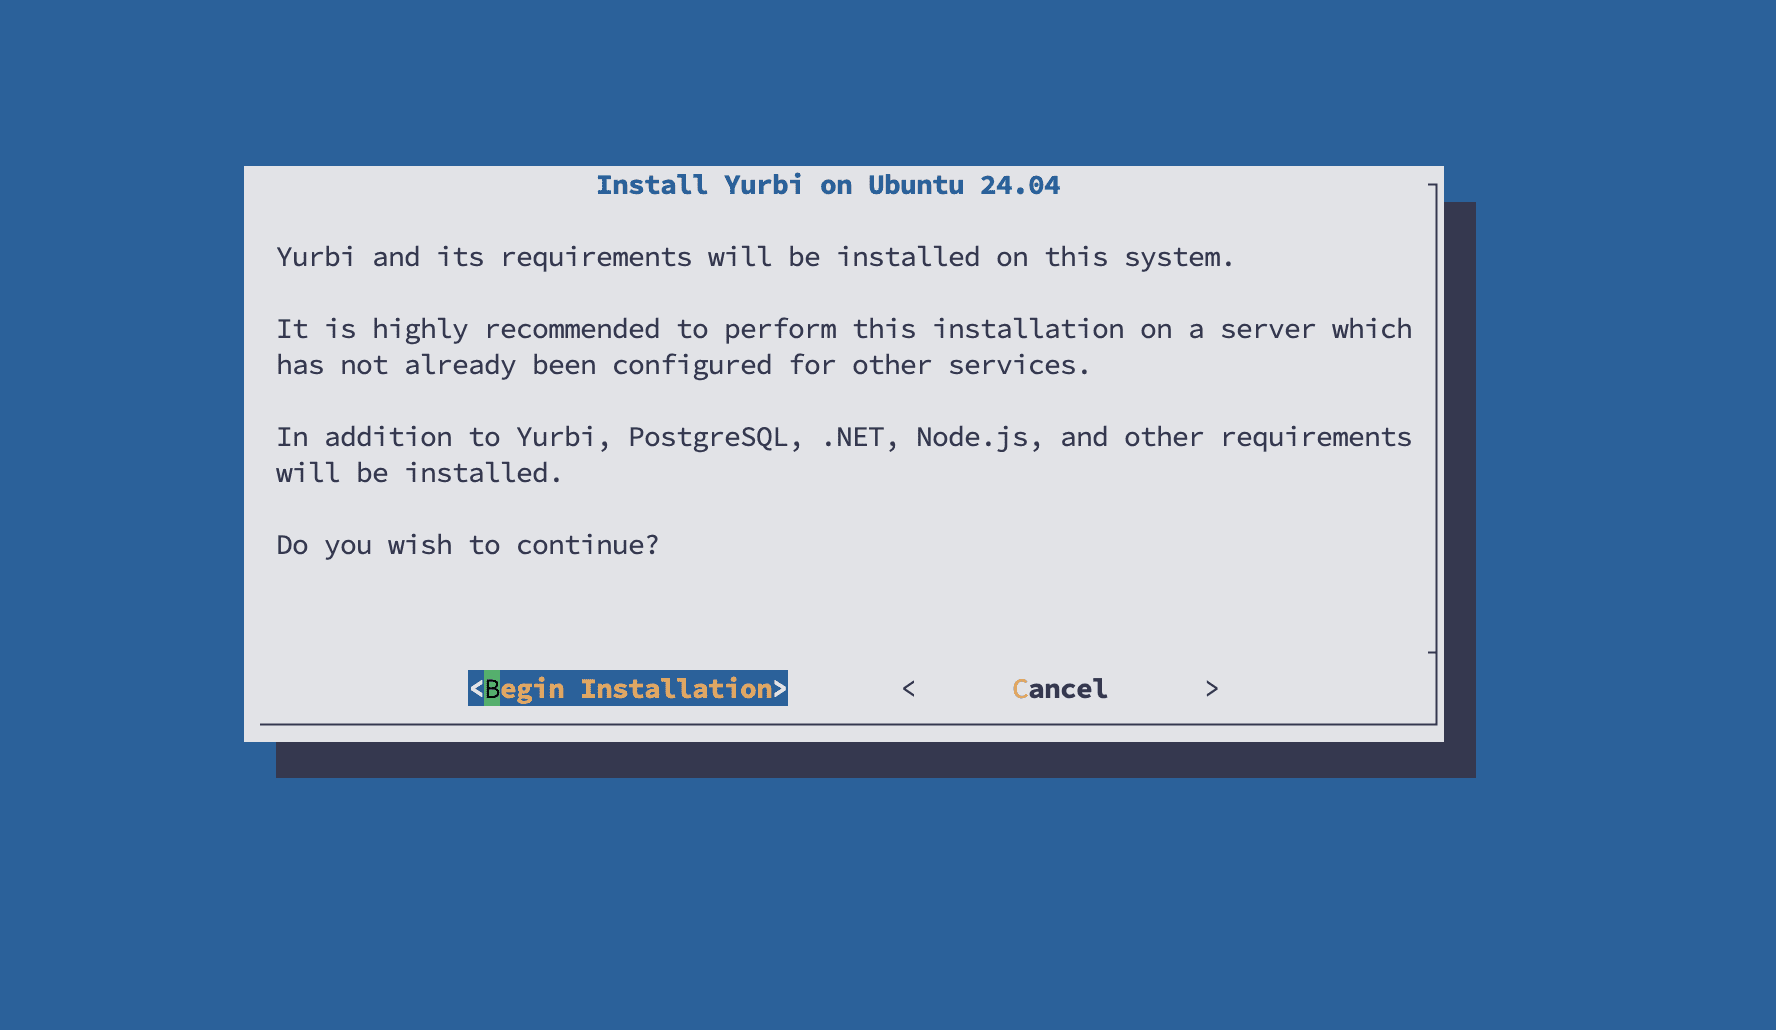
Step 2: Begin Installation
When the installer dialogue displays, press Enter to begin the installation process.
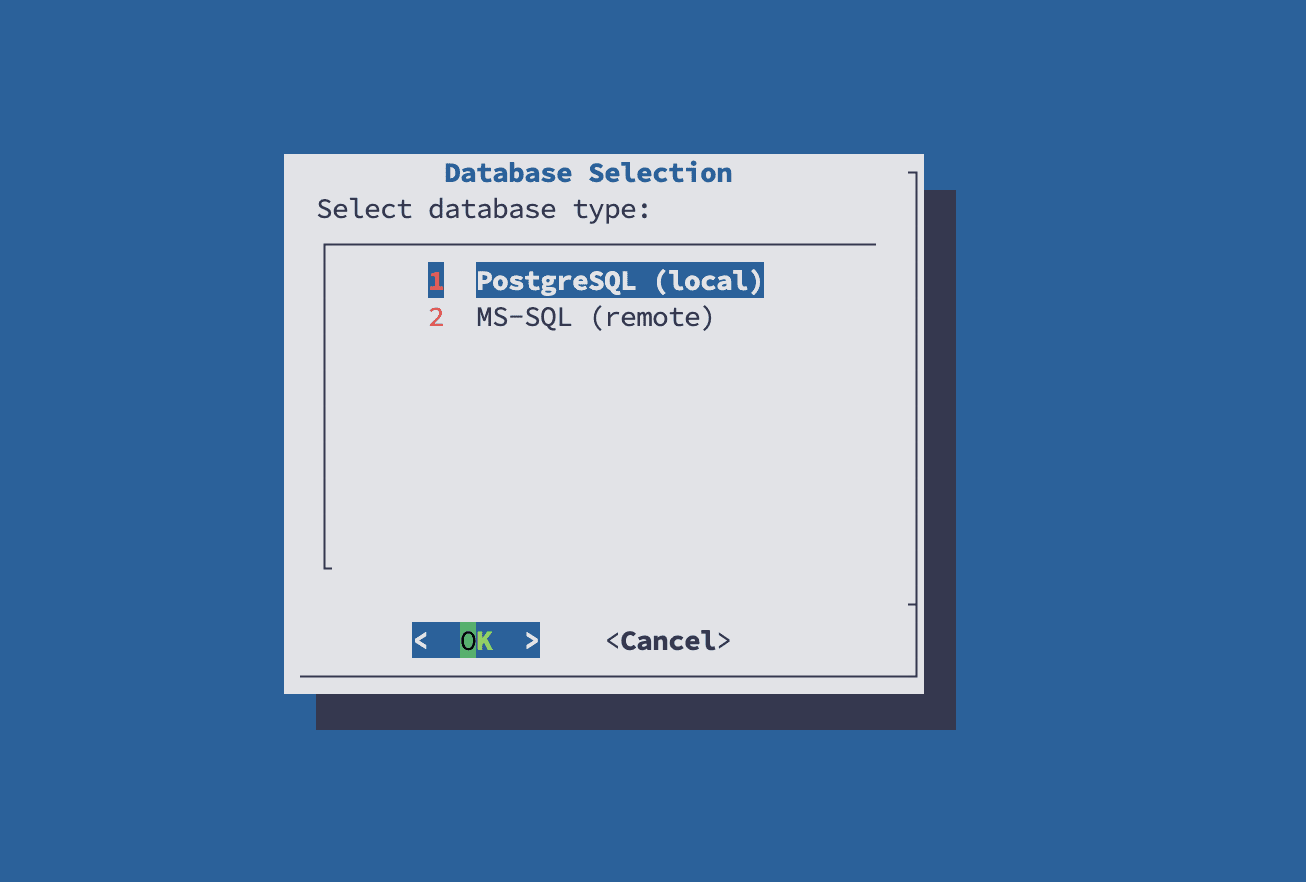
Step 3: Database Selection
Press Enter to select the embedded PostgreSQL database to be used as the Yurbi backend.
For instructions on setting up MS SQL as your backend database, please see this article.
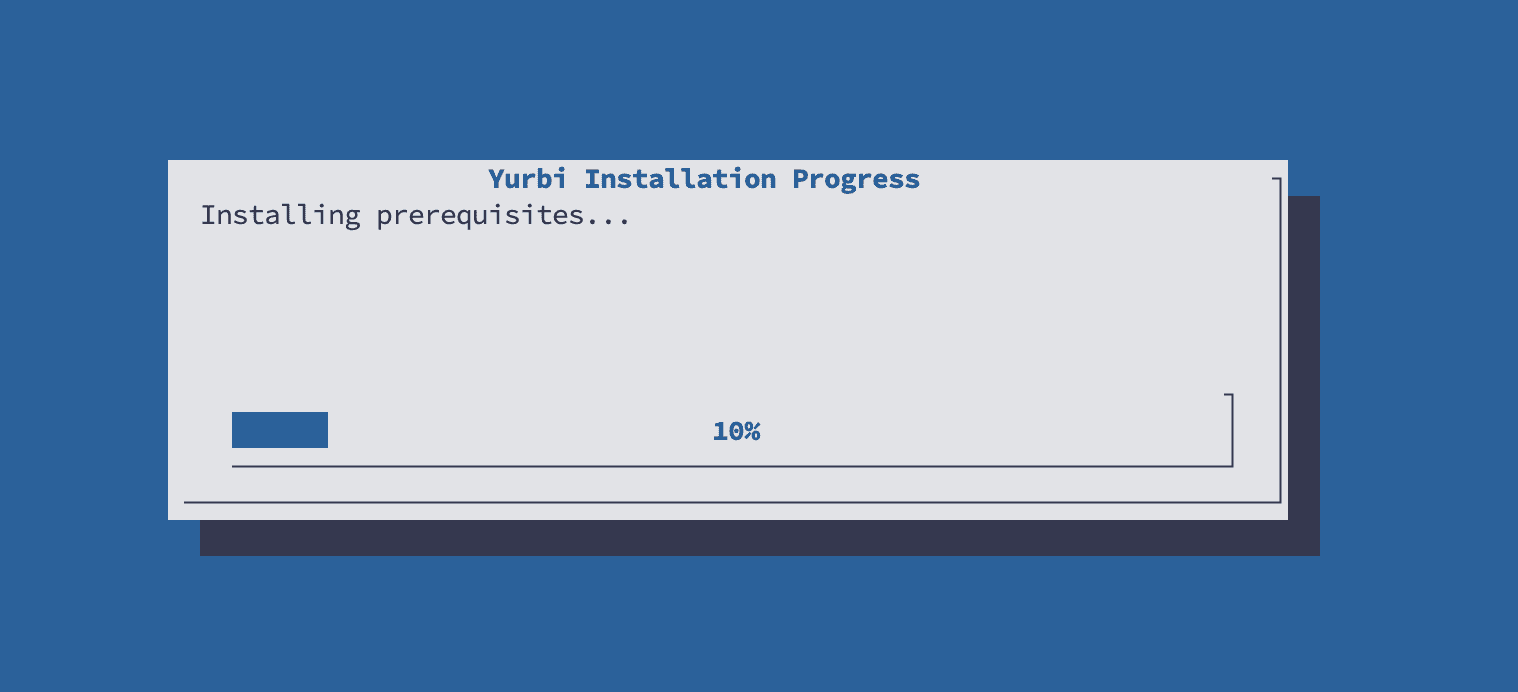
Step 4: Monitor Progress
The installer dialogue will provide an approximate percentage as the installation progresses. In some cases, it may appear to be hung; however, please be patient as some steps do take longer to configure.
To see the progress in more detail, SSH to another terminal window and monitor the detailed log with the following command:
sudo tail -f /root/yurbi_install.log
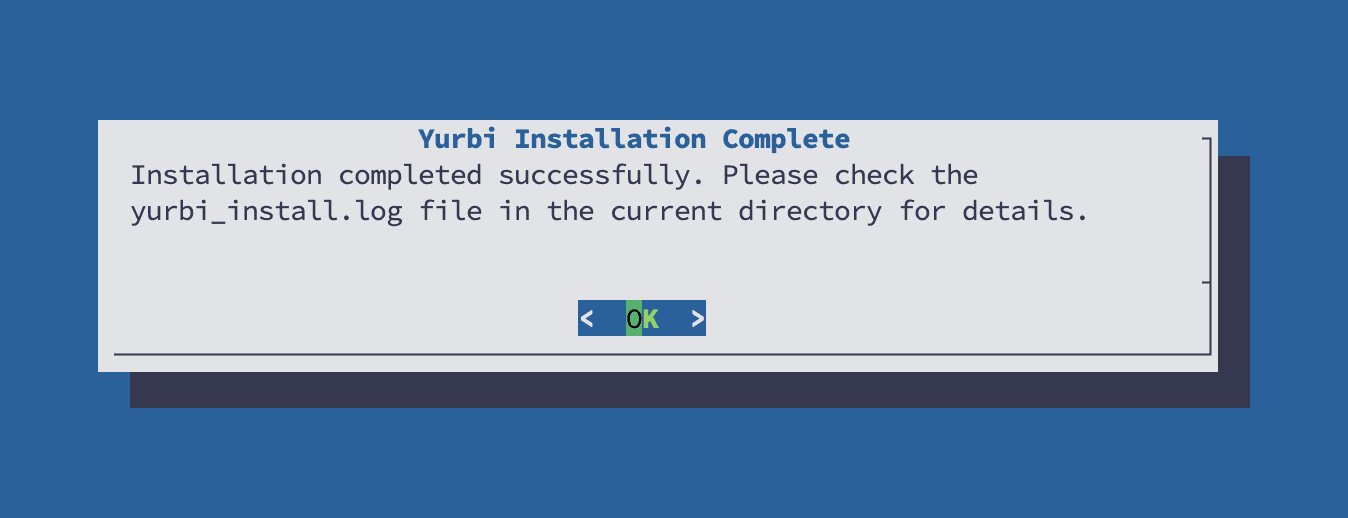
Step 5: Script Completion and Next Steps
Upon completion of the script, you will see this dialogue. The results of the install are located at /root/yurbi_install.log.
To confirm the installation:
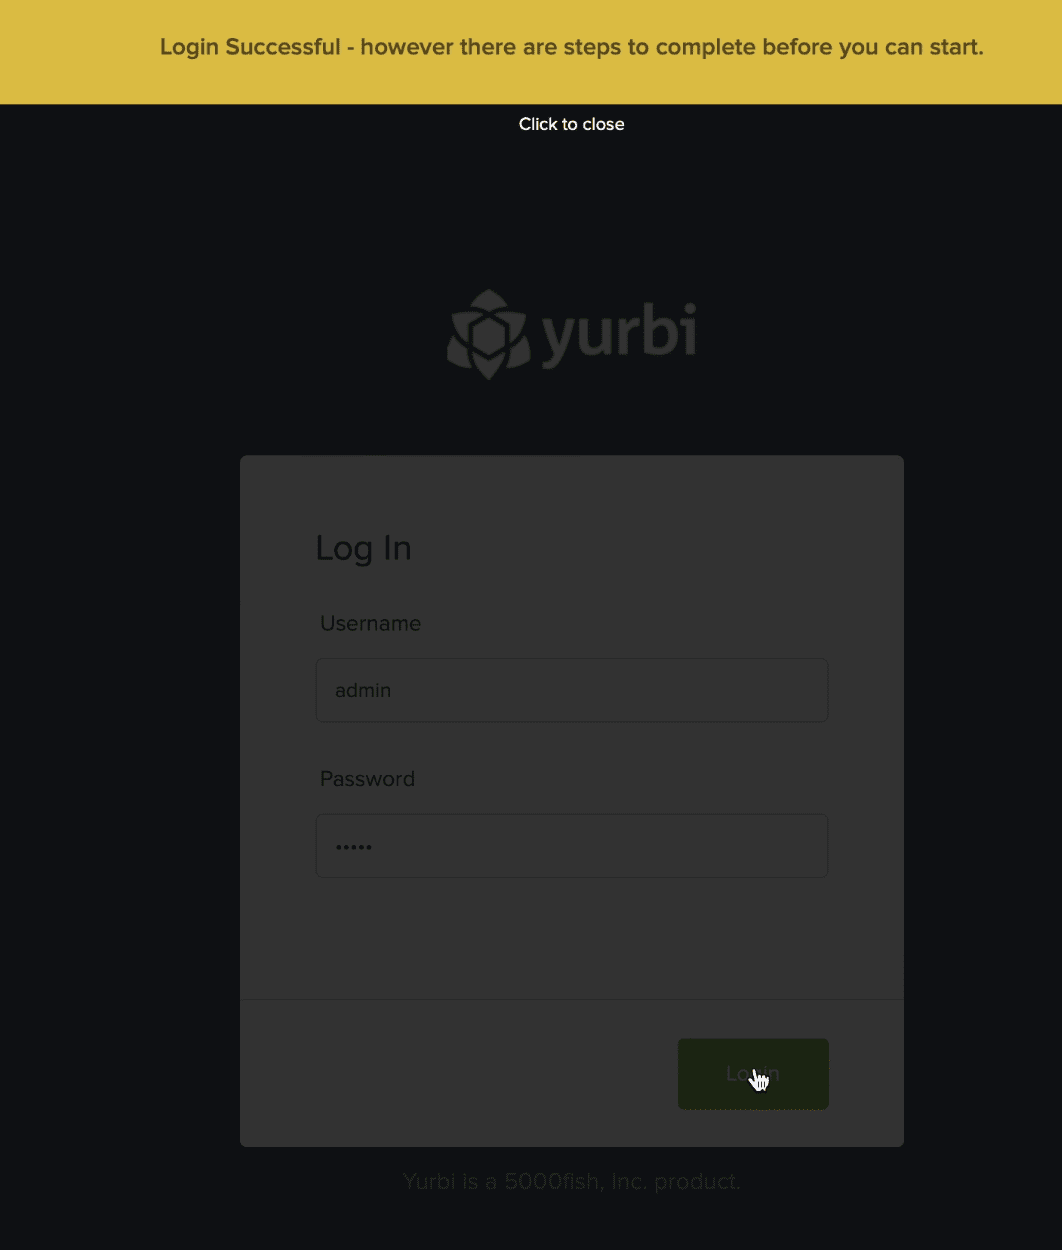
1. Open a browser and navigate to:  http://<server ip>/
2. The Yurbi login screen should appear
3. Login with the default credentials:
        user: admin
        password: yurbi
You should see a yellow alert bar indicating that you must activate Yurbi. Follow the instructions to proceed with the activation process.
Next Steps
Post Activation Suggested Activities:
- Apply the Latest Updates: See this article.
- Configure HTTPS and an SSL Certificate: See this article.
- Archive Your PostgreSQL Database Password: See this article.