How to manage schedule reports by group
Version: Yurbi v12
Role: Agent and higher
Permission: Agent with view permission to the report or dashboard
Overview
This article shows a step-by-step process on how one can schedule reports by group.
Managing Scheduled Reports
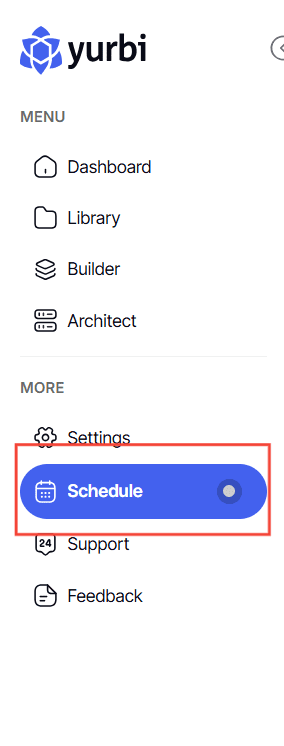
1. To manage scheduled report, go to the side bar and Click Schedule
Follow the steps under this article to be able to edit your scheduled report
Configuring Schedule Groups
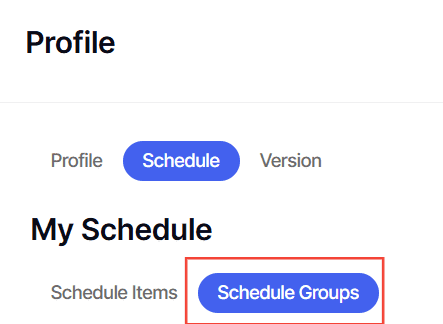
1. Click Schedule Groups
2. Click Create Schedule

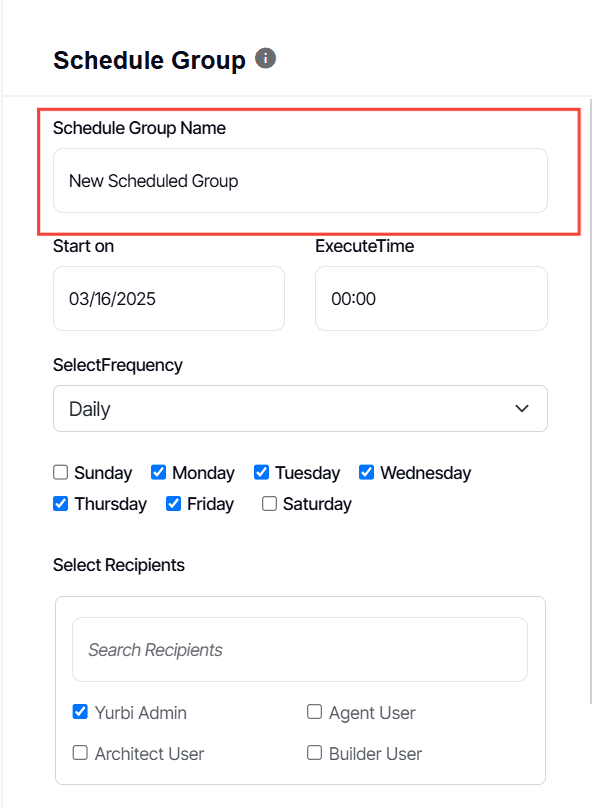
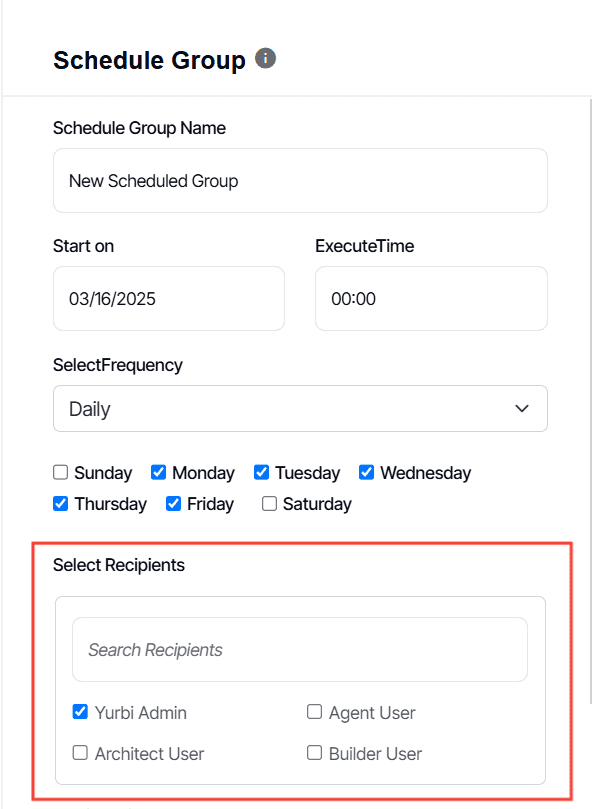
3. Type in Schedule Group Name
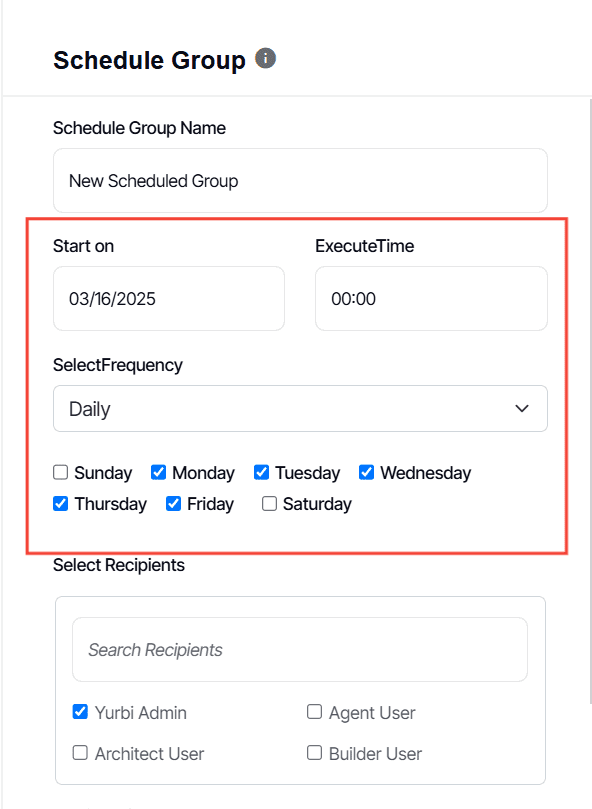
4. Configure the start on date, execution time and frequency of the scheduled group.
5. Select your recipients.
6. Type in an Email Subject and Body
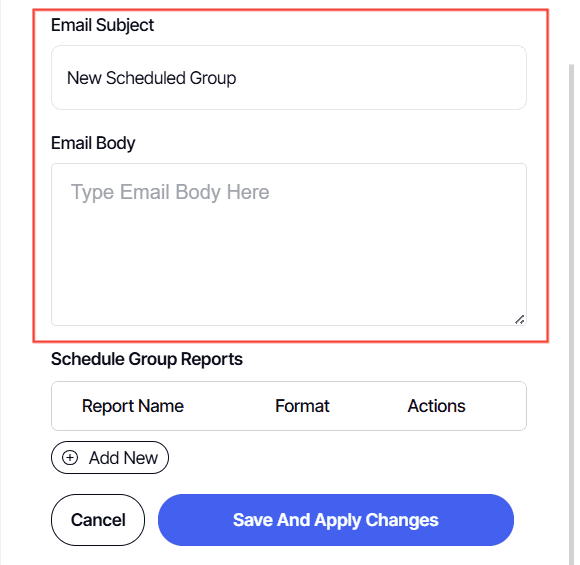
7. Click Add New

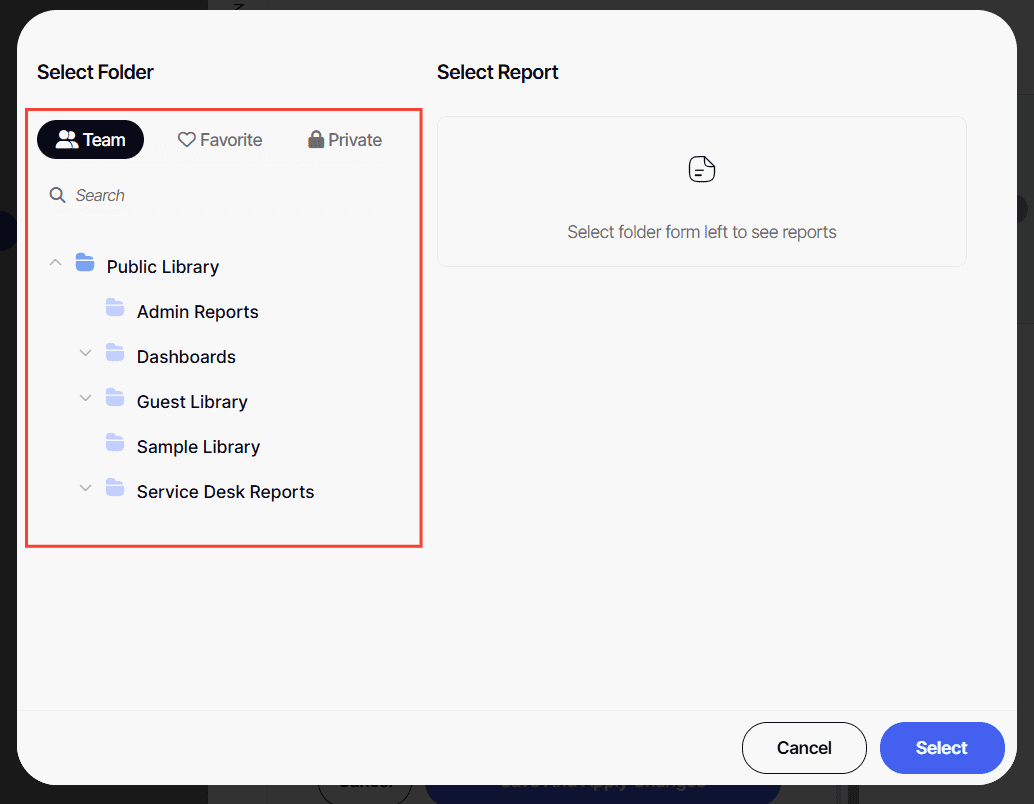
8. Select the folder where the report or dashboard you want to schedule is nestled in.
9. Click on the report once located.
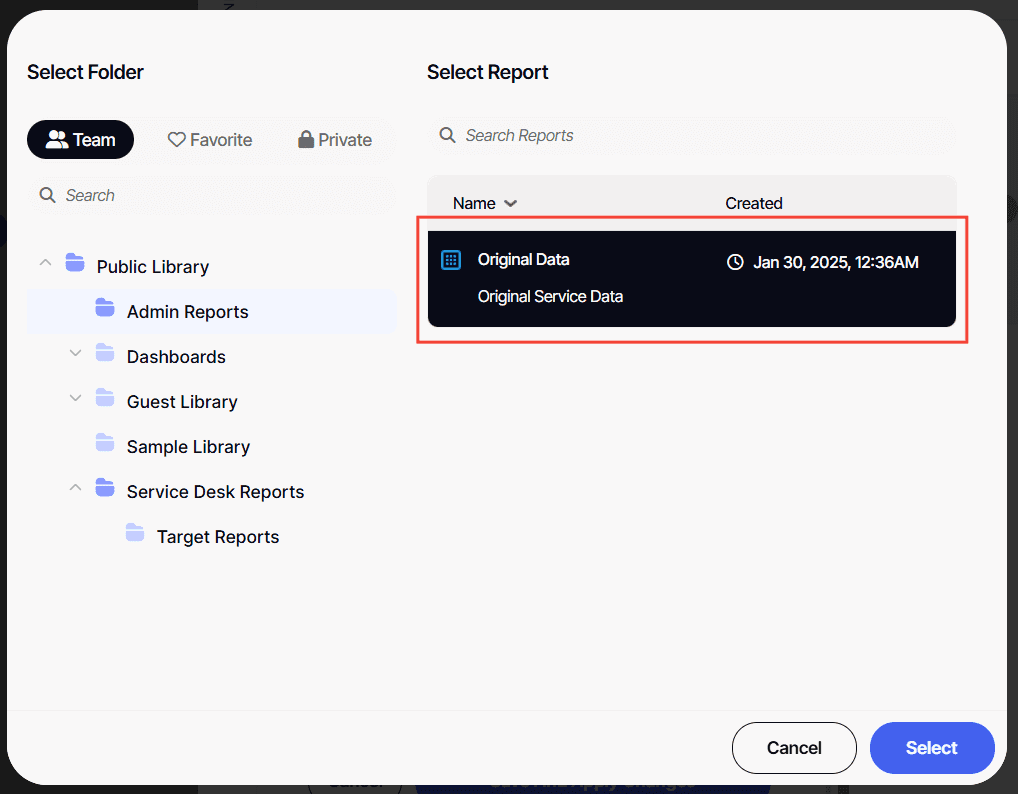
10. Click Select

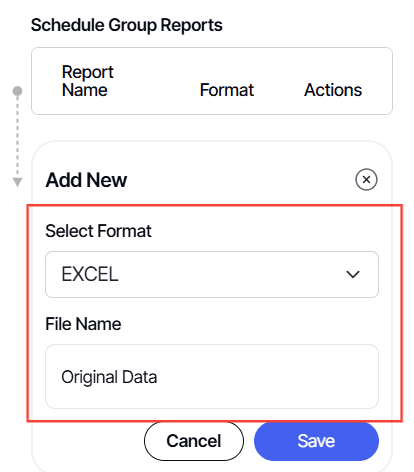
11. Select your format and configure the file name, if needed.
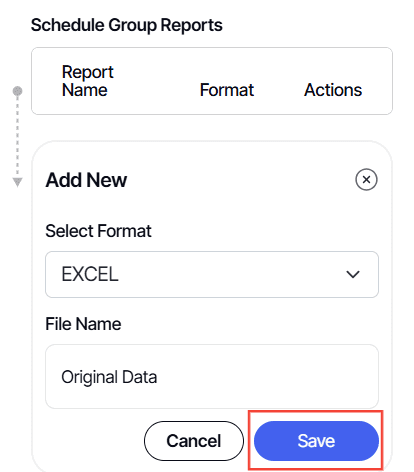
12. Click Save
13. Click Save and Apply Changes

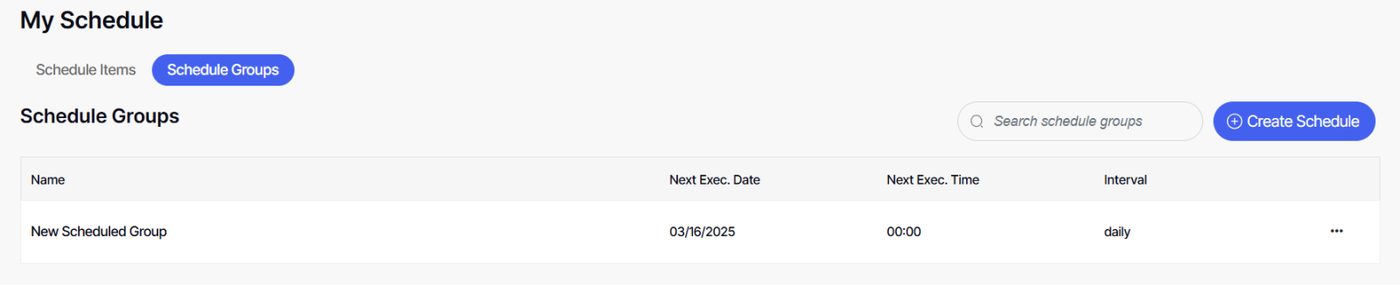
14. Look at the Scheduled Groups to see if the group you’ve added appear.
And there you have it! You now know how to send a report or dashboard via email using three methods!