Tenant mode is best suited for installations that require support for multiple customers using a single Yurbi installation and database. This guide is designed for the Yurbi server administrator, who should be familiar with server administration, Internet Information Services, and operating system best practices.
In most instances, you won't want your customers accessing Yurbi as an agent or builder to see security groups, folders, or reports belonging to other customers. Similarly, they should not use the default "All users" group or see contacts of other customers while scheduling reports.
Tenant mode resolves these concerns by:
- Filtering the security group list to only show groups that users belong to.
- Removing the "All Users" group from these lists.
- Limiting the contact list to only those contacts that belong to user's groups when scheduling reports.
Step 1 - Enable Tenant Mode
- Launch Notepad as an administrator.
- Open the file at the following location:
C:\Program Files (x86)\yurbi\Config\appSettings.config.
<setting>
      <key>tenant_mode</key>
      <value>true</value>
      <encrypt>2</encrypt>
</setting
Step 2 - Restart the Yurbi IIS Application Pool
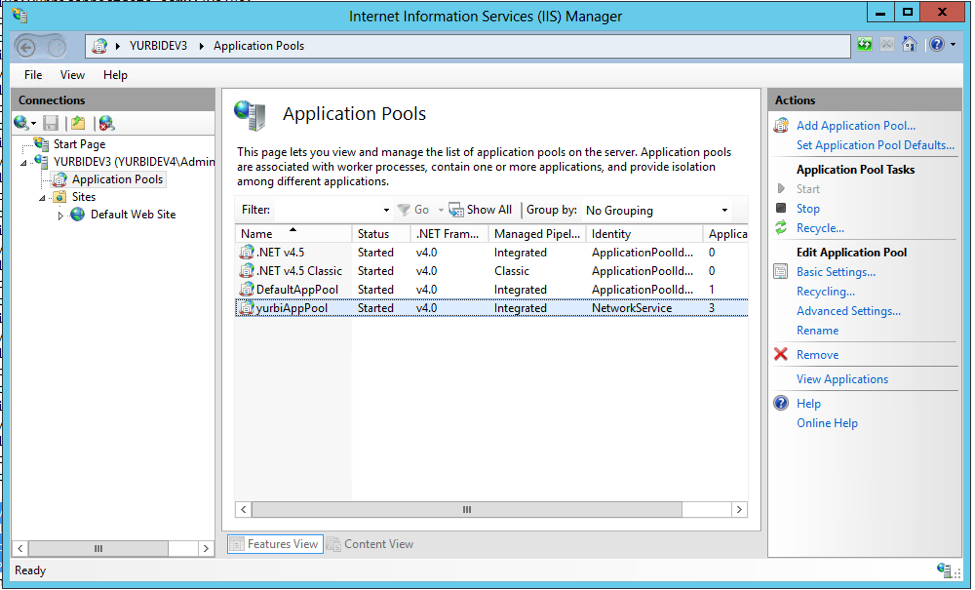
- Open the Internet Information Services (IIS Manager).
- Expand the Server name on the left and highlight Application Pools.
- Highlight yurbiAppPool, then click the Stop link on the left. Wait a few seconds, then click Start.
Congratulations! You have now successfully enabled the Tenant Mode.
