Version: Yurbi v11
Role: Builder or higher
Permission: Builder access to the application
This guide is structured to provide a step-by-step walkthrough for using add formula within your reports. We will talk about how to the add formula option, how to configure them, and how to edit them. Lastly, a use case application will be given to have the user understand where this option can be applied.
This documentation is ideal for users who need to perform complex data analysis, generate more insightful reports, or simply wish to tailor reporting metrics to better suit their business needs.
Reminder that if you click and insert the pre-built formulas it will automatically set the data type correctly. But if you manually type in a formula you do want to make sure you set it correct (to a num for example if you added a function that will return a number).
Let us dive into the process:
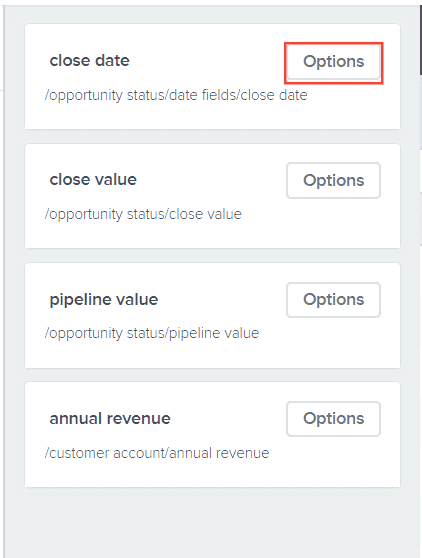
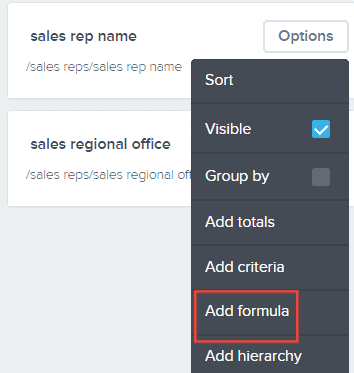
Go to the report field and select the field you wish to configure.
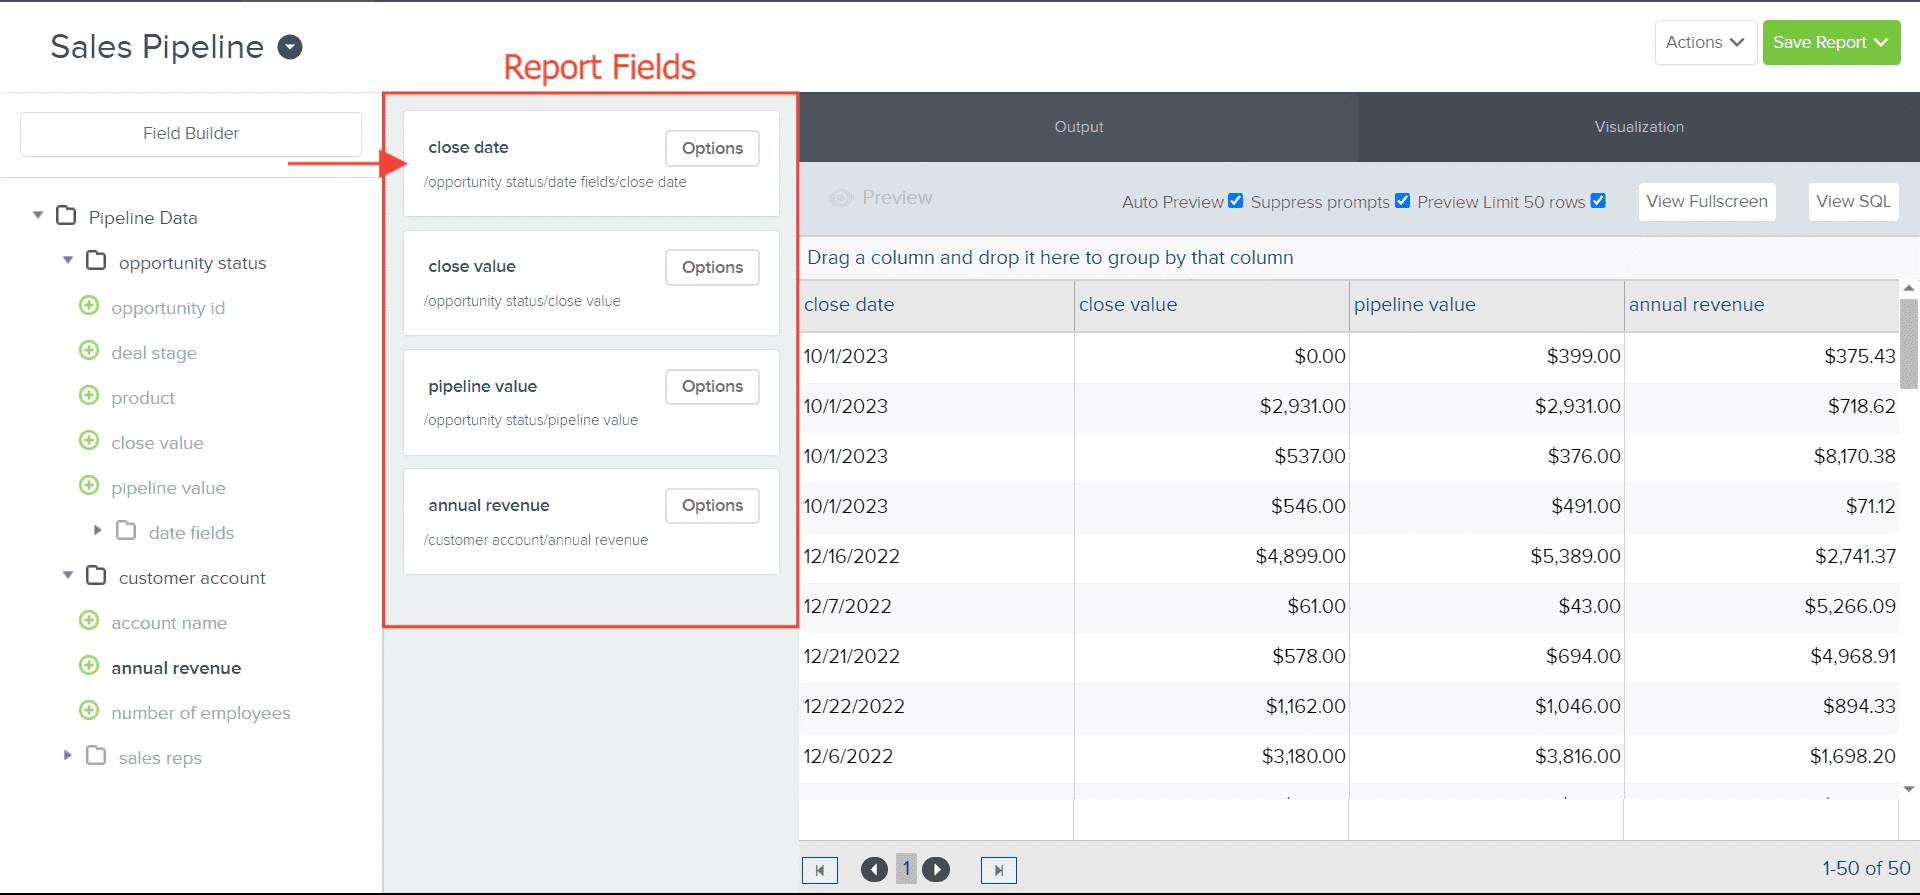
Click on the Options button.

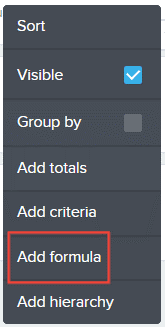
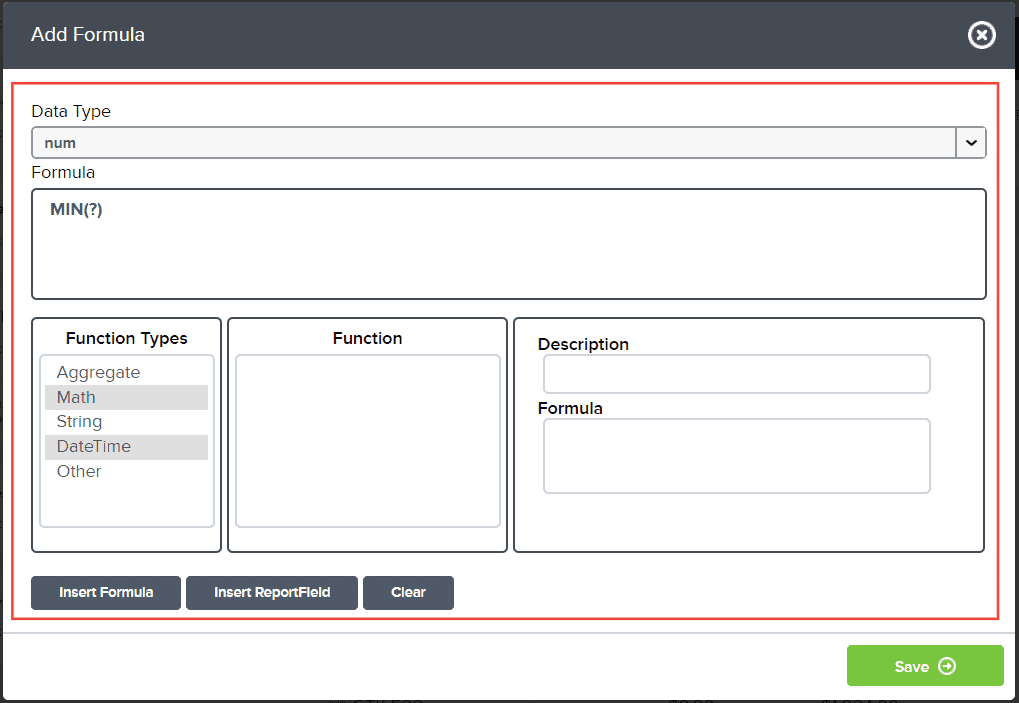
Select Add Formula option
Adding Formulas
Select Data Type from the drop-down menu. By default, the shown data type is dependent on what data the selected report field has.
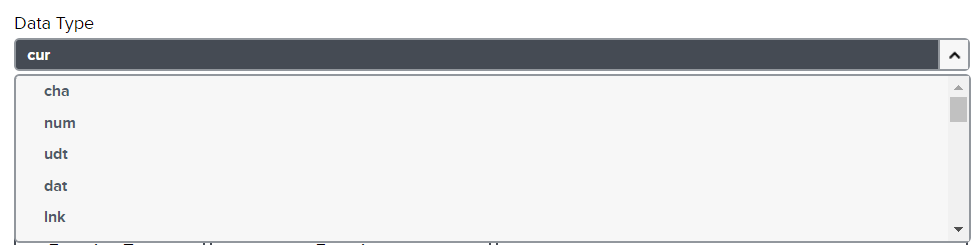
Note: There will be cases where you want to change the data type and not insert any formula at all. For example, if you have numbers that are really currencies and want to show the currency symbol and display it like currency, you add formula, set the data type to CUR.
If you have a date that includes the time portion, you add formula and set to DPO to display the Date Part Only.
Here is an in-depth article about the different data types within Yurbi.
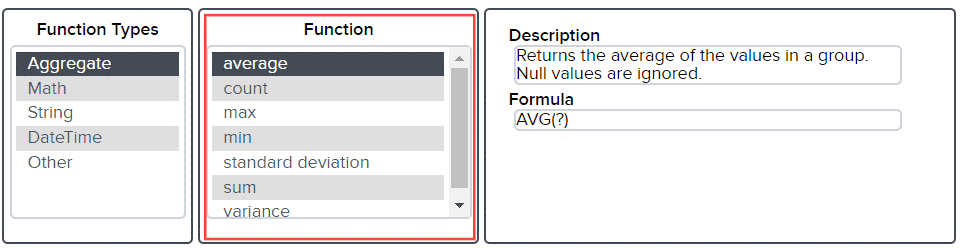
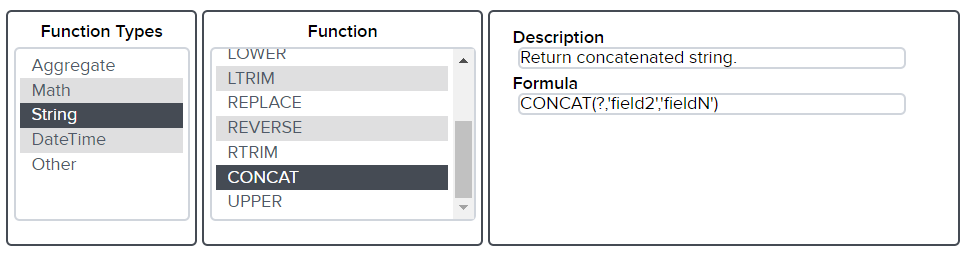
Select Function Type
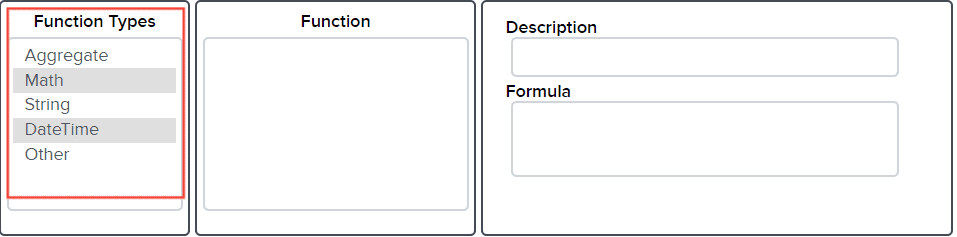
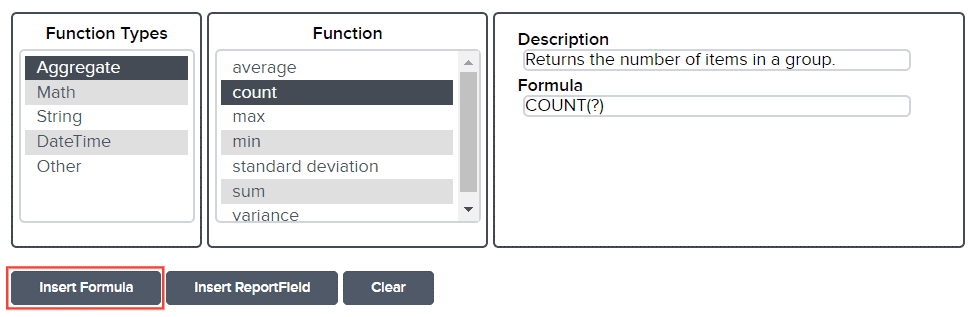
Select corresponding Function. You can see the usage of the function in the description box with the formula used.
Click Insert Formula
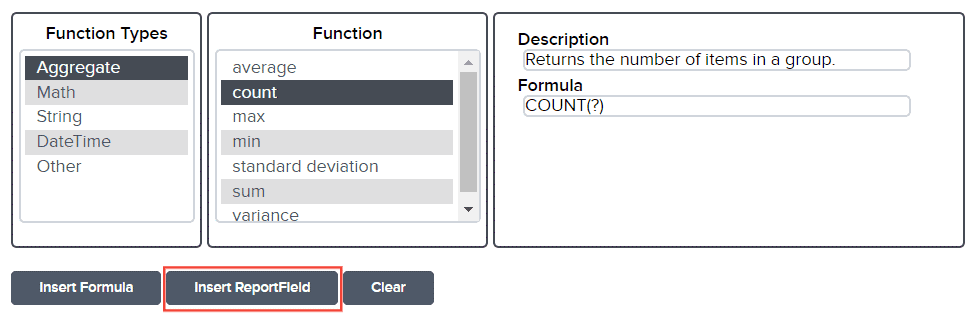
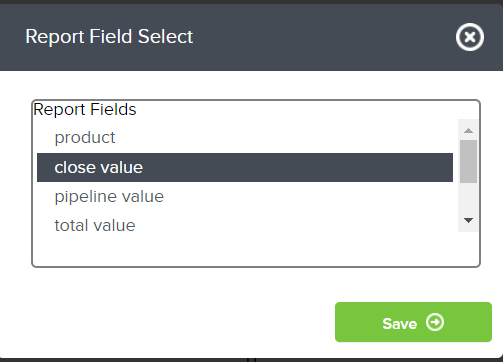
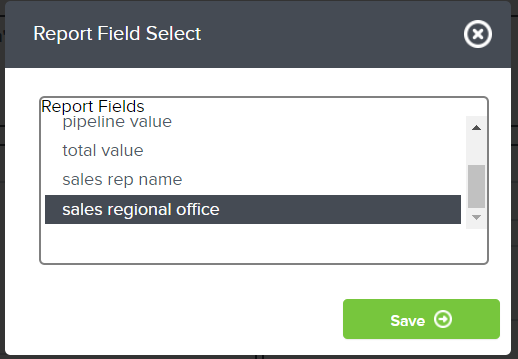
You can also use Insert Report Field to include a report field in the formula you’re going to make.
Then Select the report field you want to use
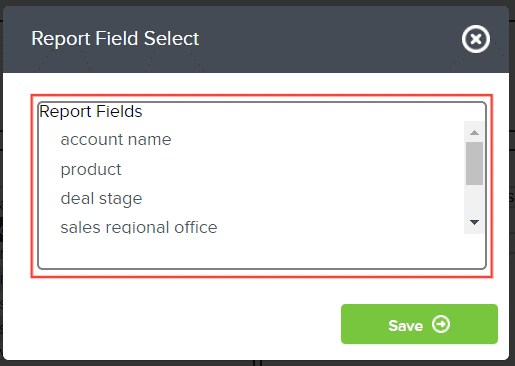
Click Save

Then, Click Save to save the configured formula

You can see below the report field the newly configured formula for that field.
Editing Add Formula
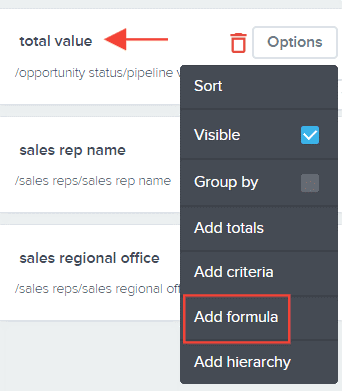
Click on the Options button.
Select Add Formula option

Configure based on your needs.
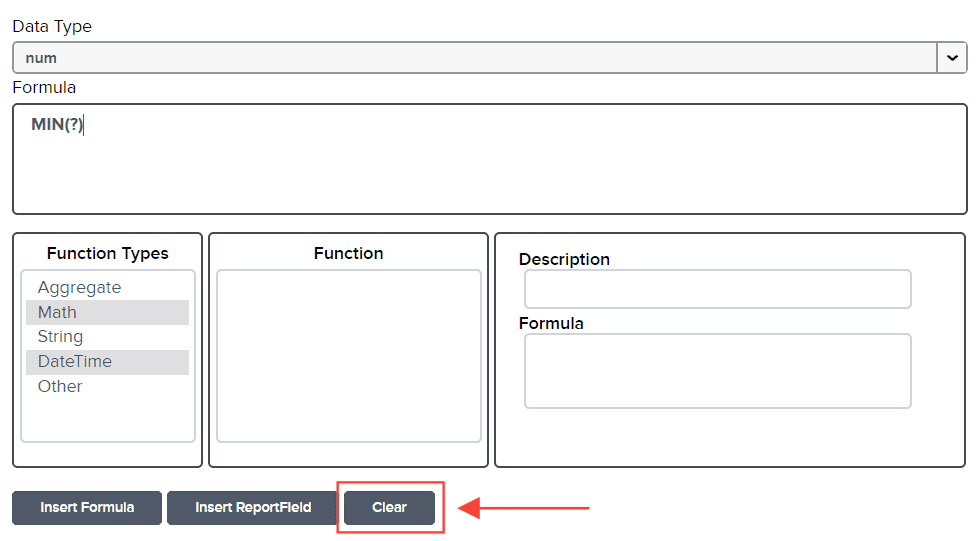
To erase a part of the formula, simply use backspace until the value of the selected part is gone or highlight the part you want to delete and press delete or backspace.

To erase everything, click Clear.
After configuring, click Save.

Remember to save your report once you are done configuring.
Use Case Application
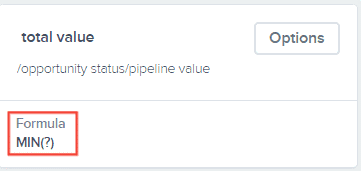
One of the use cases for the add formula option is where you need a field where it sums the value of two or more fields in the report.
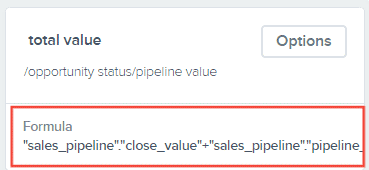
In this case, we are going to add close value and pipeline value for the report.
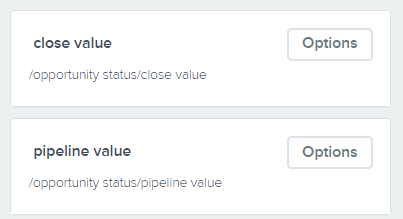
We add two pipeline value in the report field and renamed the other one as total value.
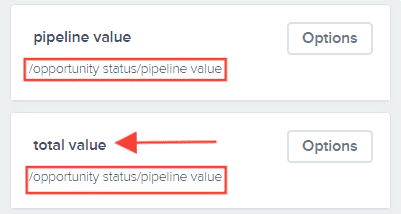
Then, we add the formula under the total value field.
The formula would be using the Insert Report Field and selecting close value.
Click Save

Next, we type in the plus sign.
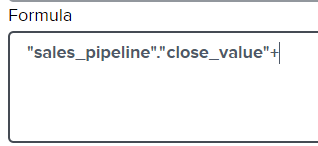
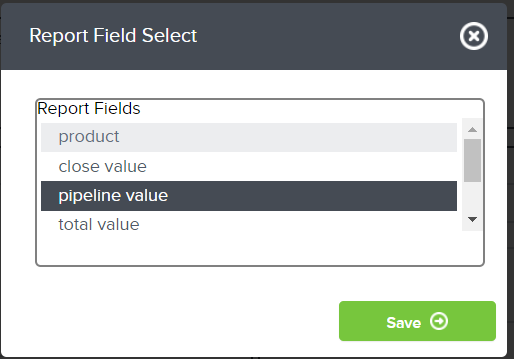
Then, use Insert Report Field again and select pipeline
value.

Once saved, the report will look like this.

Underneath the total value report field, you can see the formula used.
Another use case is adding the text value of another field to the desired field.
We added two report fields with text value.
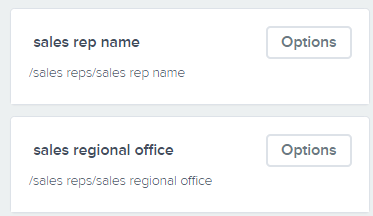
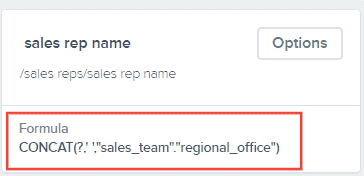
Then, we add the formula under the sales rep name field.
We will use the CONCAT function.
Once the function is added, we will use this formula.
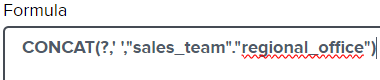
The ? represents that we are working on the selected field and we inserted a space with ‘ ‘
Next we used Insert Report Field and then selected sales regional office.
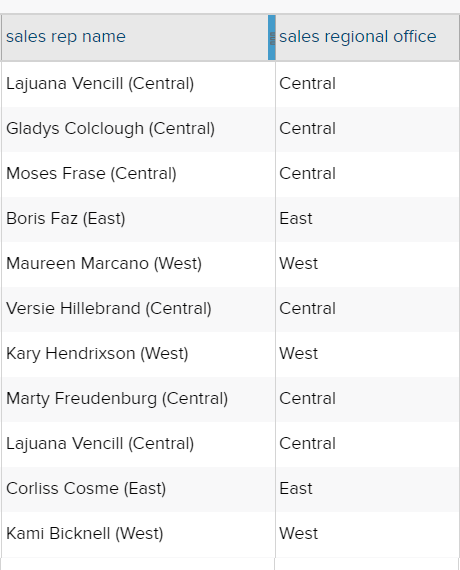
Once saved, the report will look like this.

Underneath the sales rep name report field, you can see the formula used.
We can also use this formula: CONCAT(?,' ','(',"sales_team"."regional_office",')') to create the report like this.
And there you have it! You now know how to configure an add formula option and apply it to the report you are building!