How to setup a smart filter
Version: Yurbi v12
Role: Agent and higher
Permission: agent with view permission or higher
Overview
The Smart Filter feature is designed to enhance your user experience by automatically applying filters for you based on a predetermined sequence. This sequence is set by the filter index, which decides the order of applied filters. The Smart Filter will conveniently handle turning filters on and off based on your selections and changes.
Here is an example of Smart Filter in action:
Let us say you have three filters: Group, Category, and Name, with the respective filter index of 0, 1, and 2. If you select Customer Service under the Group filter, the Category and Name filters will only display relevant options for Customer Service. Furthermore, if you then select a Category, the Name filter will only display options related to that Group and Category.
If you decide to choose a different Group, the Category and Name filters will automatically turn off, ready to provide you with fresh, relevant options upon your next selection.
Setting up a Smart Filter is simple. Let us dive right into it:
1. Click on New Filter, located in the filter bar region of your dashboard.

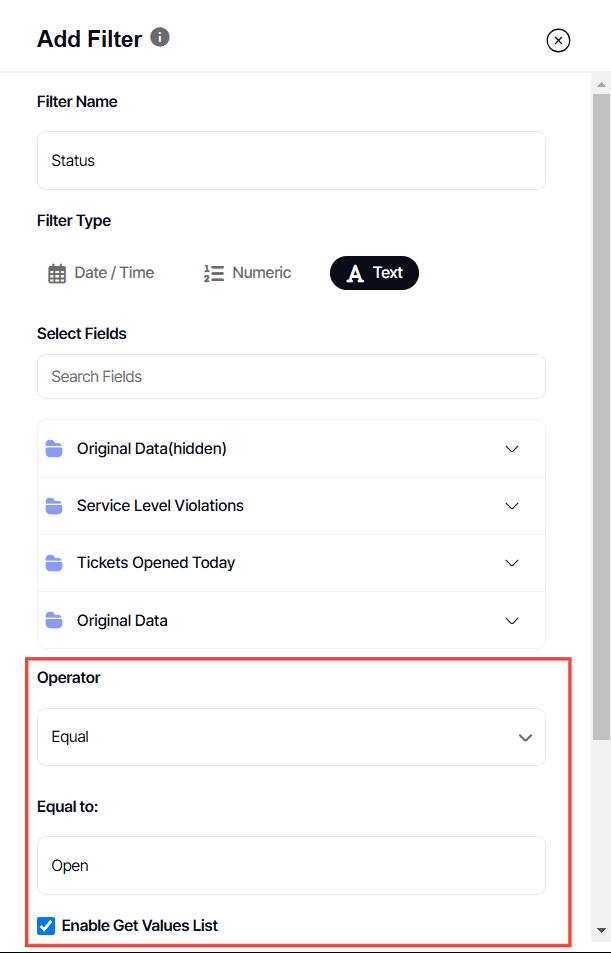
2. Type in your desired Filter Name.
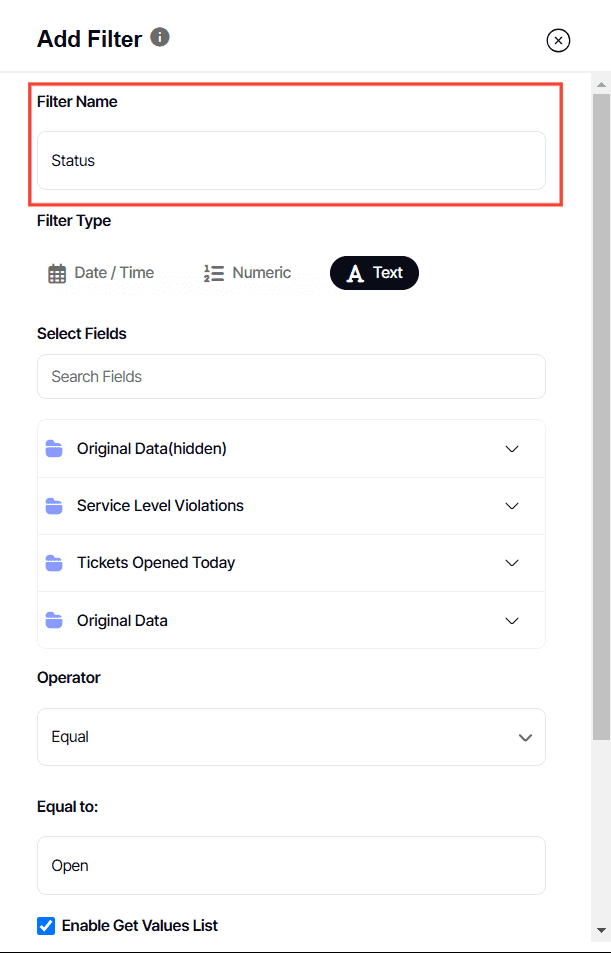
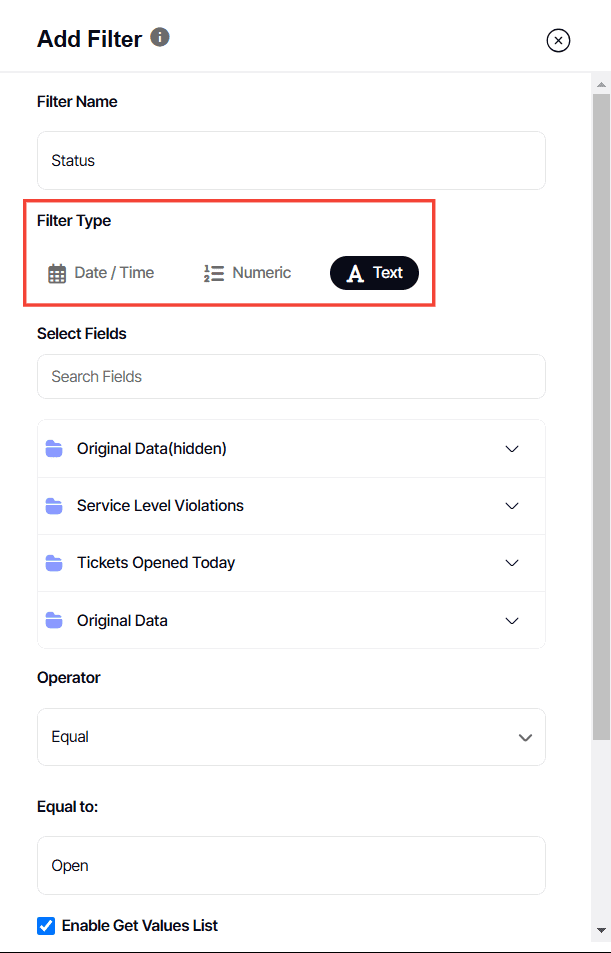
3. Select your desired Filter Type.
The system will display the fields available to filter as per your selected Filter Type.
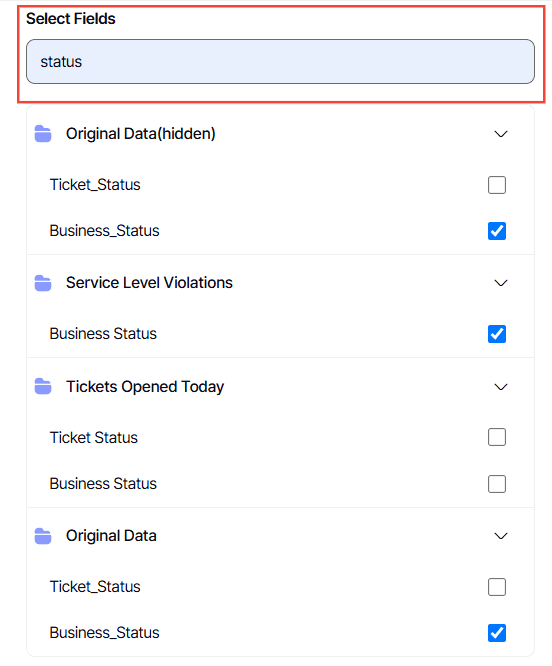
4. Under Selected Field, click down arrow for each widget listed
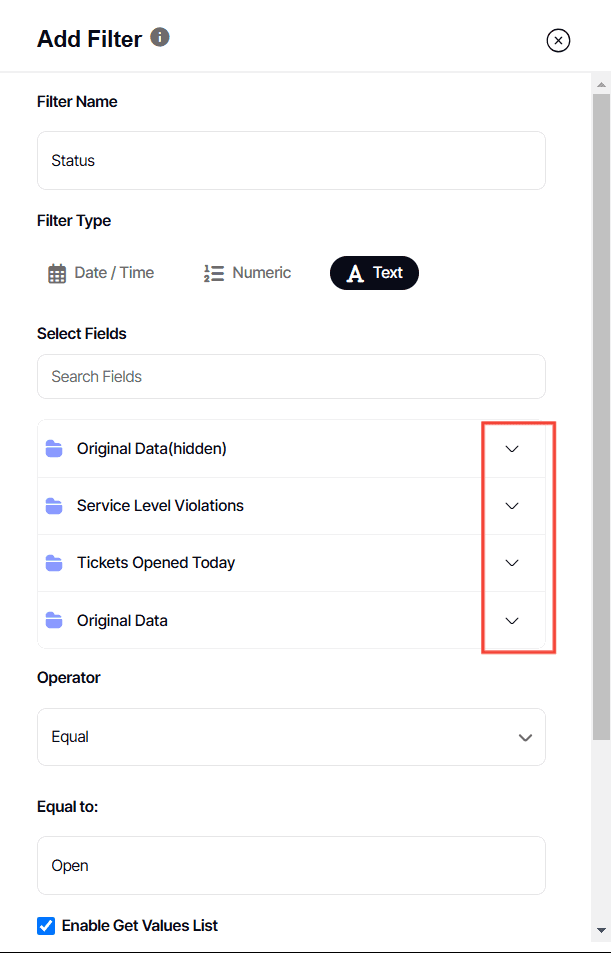
5. Check the field this filter should apply to. A single filter can only apply to 1 field per report.
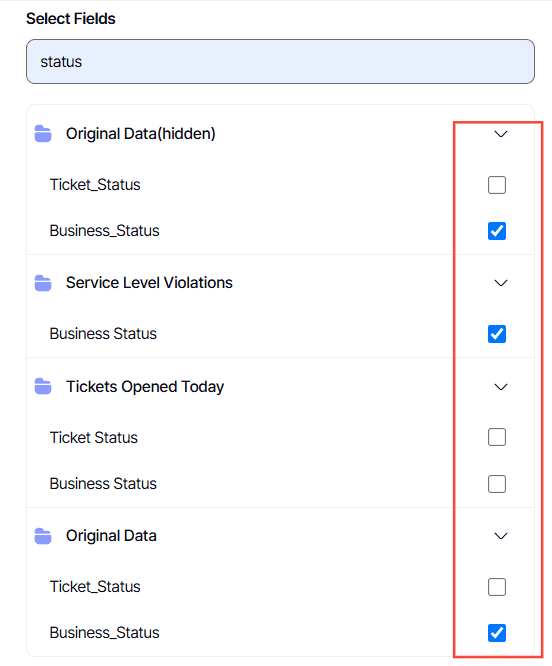
6. Each box represents a report on the dashboard. As an agent with view permission, you cannot control what fields are shown.
TIP Ideally, you'll want to tick the same box for every field. But no worries if a checkbox field doesn't appear! Your dashboard data will remain consistent and accurate.
7. You can also use the search box to locate the field you want to use.
8. Select the Operator you want to use and configure it to your liking
9. Click Advance Options.
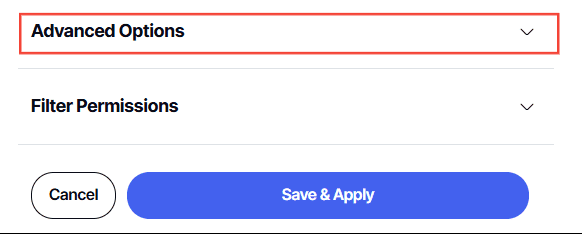
10. Tick the box Enable Smart Filter

11. Finally, click Save & Apply.

To use the Smart Filter feature, you will need to create a sequence of filters. This process is just like creating a new filter, but with your Smart Filter turned on.
And there you have it! Now you know how smart filter function and how you can set it up in your dashboards!