How to create a text-type dashboard filter
Version: Yurbi v12
Role: Agent and higher
Permission: agent with view permission or higher
Overview
A dashboard filter is your personal tool for focusing on the data that matters most to you. It is like having a magnifying glass for your reports, allowing you to highlight specific areas of interest.
Imagine you only want to see data from a specific time period, like This Month, or perhaps from particular locations. A dashboard filter can narrow down your report to show only those relevant details
You have the freedom to either use pre-saved filters or craft your own to perfectly suit your needs. These custom filters can be saved as views for easy access in the future.
In this guide, we'll focus on crafting text-based filters, the most popular type amongst users. These filters are often used to segment data based on text values such as locations, customer names, product names, etc.
All images shown are just an example. Names, fields, and values will be dependent on the organization and the user logged-in
Creating a New Filter
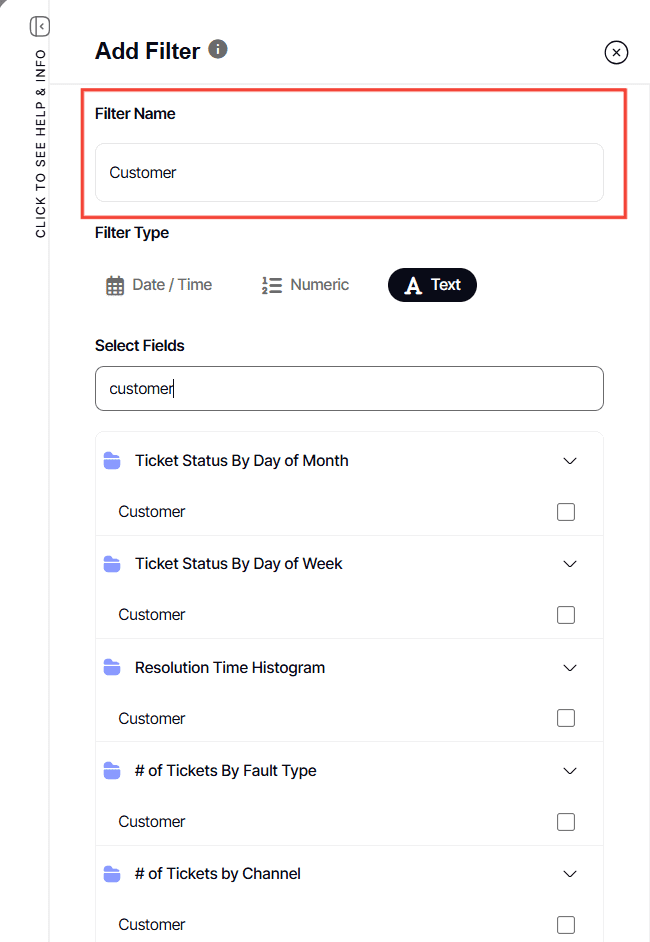
1. Click on New Filter, located below the dashboard name.

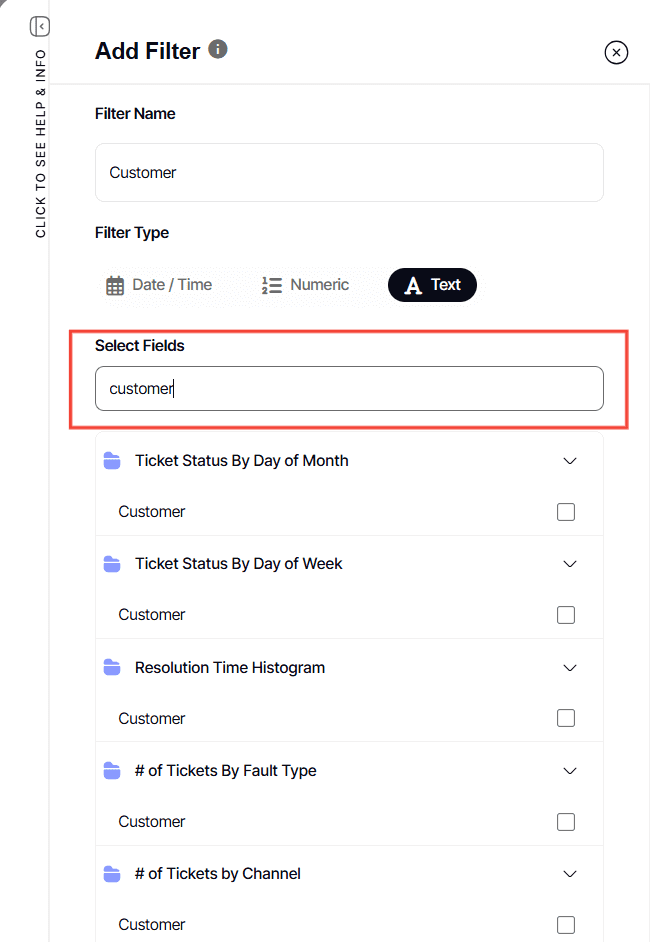
2. Name your filter – Give it a meaningful name to identify it easily later.
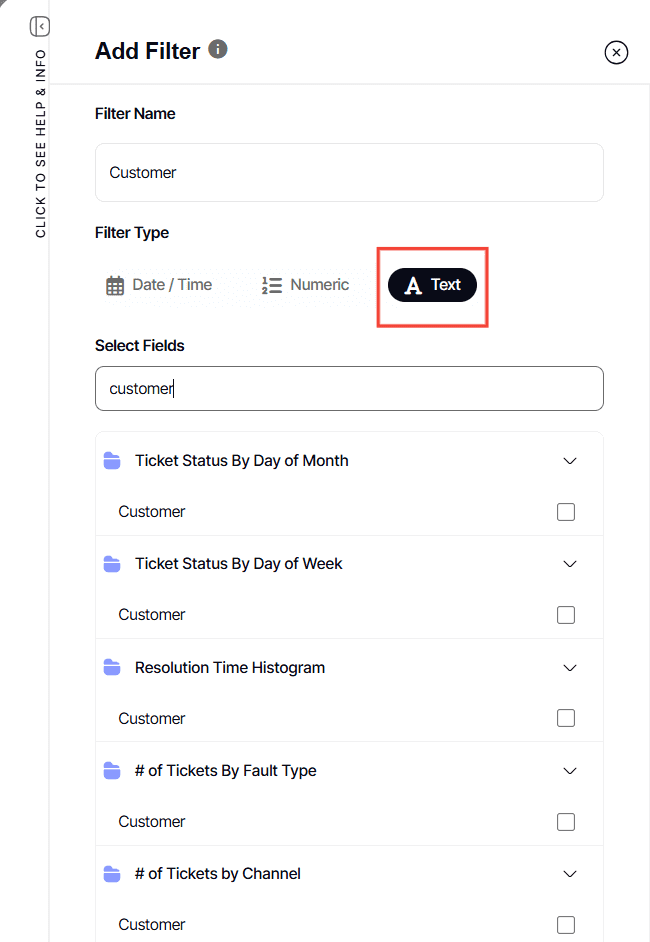
3. Select text filter type
The system will display the fields available to filter as per your selected Filter Type.
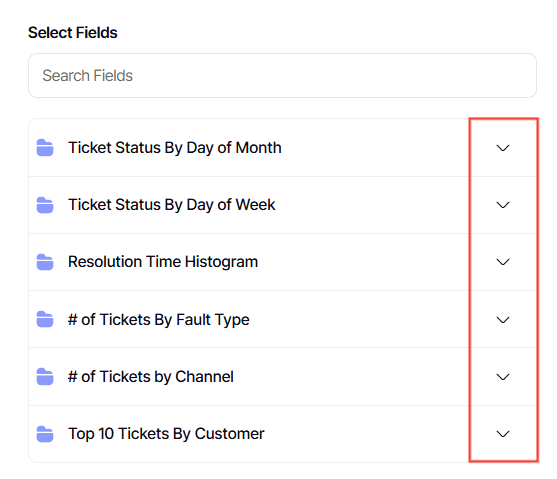
4. Under Selected Field, click down arrow for each widget listed
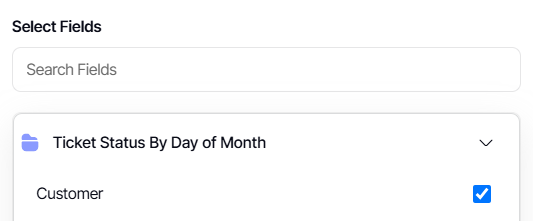
5. Check the field this filter should apply to. A single filter can only apply to 1 field per report.
Each box represents a report on the dashboard. As an agent with view permission, you cannot control what fields are shown.
TIP: Ideally, you'll want to tick the same box for every field. But no worries if a checkbox field doesn't appear! Your dashboard data will remain consistent and accurate.
6. You can also use the search box to locate the field you want to use.
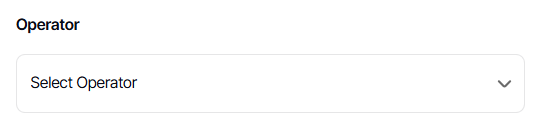
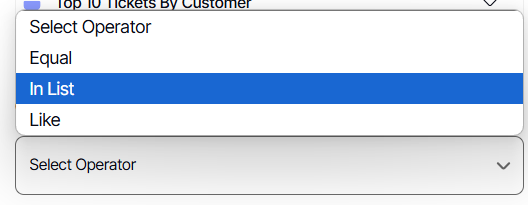
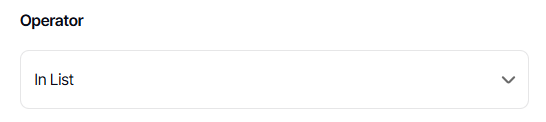
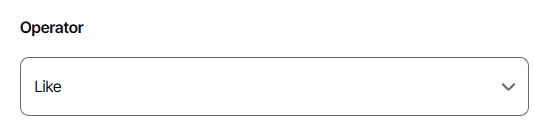
7. Select the Operator you want to use
8. In a Text Filter Type, under Operator, you can choose among EQUAL, IN LIST, or LIKE. Here is how they differ:
TEXT FILTER: EQUAL
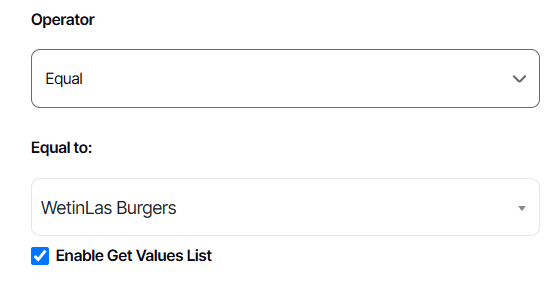
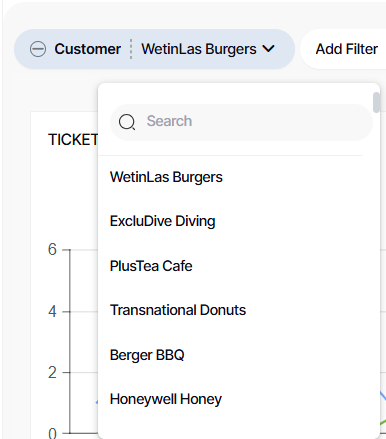
1. EQUAL: This provides a single-select or dropdown list filter.
By default, a filter dropdown can only display 250 items. If your source data contains more than this, instead of a dropdown, the filter will automatically convert into a textbox.
This number can be increased by the server admin.
2. By default, the Enable Get Values List is checked
![]()
3. Click Save & Apply

4. To activate your filters, click on the filter you just created.
Note: After clicking save & apply, you will be redirected to the dashboard with the filter activated already.
5. For an EQUAL filter, this will be the filter interface shown in the dashboard.
TEXT FILTER: IN LIST
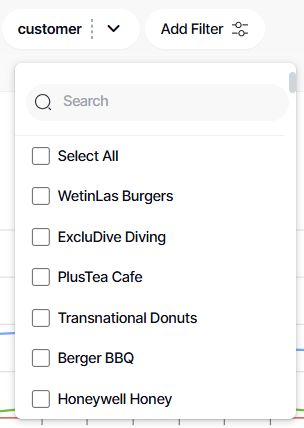
1. IN LIST: This provides a checkbox filter.
Under In List you can leave it blank or choose your desired value
2. On the Operator option, leaving these fields blank allows the user to choose their desired value for filtering on the dashboard.
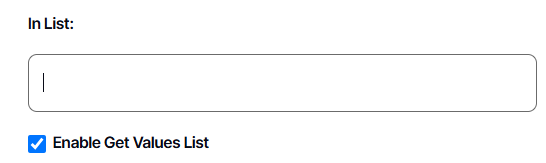
3. By default, the Enable Get Values List is checked
![]()
4. Click Save & Apply

5. To activate your filters, click on the filter you just created.
Note: After clicking save & apply, you will be redirected to the dashboard with the filter activated already.
6. For an IN LIST filter, this will be the filter interface shown in the dashboard.
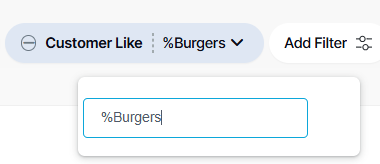
TEXT FILTER: LIKE
1. LIKE: This provides a search filter.
2. Under Like you can leave it blank
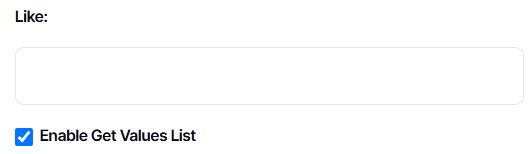
On the Operator option, leaving these fields blank allows the user to choose their desired value for filtering on the dashboard.
3. By default, the Enable Get Values List is checked
![]()
4. Click Save & Apply

5. To activate your filters, click on the filter you just created.
Note: After clicking save & apply, you will be redirected to the dashboard with the filter activated already.
6. For a LIKE filter, this will be the filter interface shown in the dashboard.
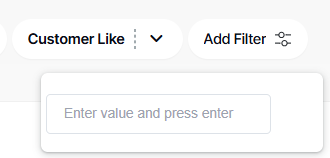
TIP: When using a search box filter, you can use % when entering a value
7. Entering a value without % will only return values starting with the one you entered
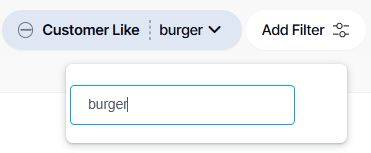
8. Entering a value with % at the start will return values that have it anywhere in the phrase
Note: Depending on the configuration of your data source, this could be case-sensitive. burgers may not bring back fields that match Burgers if your underlying database is set to be case-sensitive
Remember to save each time you make changes, either to overwrite or save as a new one.
And there you have it! You now know how to create text filters for your dashboard!