Google Sheets (Public API)
Part 1. How to Setup an API Connection to Google Sheets within Yurbi
This guide will walk you through creating a connection between Google Sheets and Yurbi using the Google Sheets API. Follow the steps below to set up the API, enable public sharing for your spreadsheet, and construct an API call that retrieves your data. Once you’ve verified the API call using a tool like Postman, you can integrate it into Yurbi.
1. Create the Google Sheets API in Google Cloud Console
-
Access the Google Cloud Console:
- Navigate to console.cloud.google.com.
- Sign in with your Google account.
-
Create a New Project:
- Click on the project dropdown on the top left.
- Select “New Project.”
- Provide a project name and (if needed) an organization.
- Click Create and wait for the project to be created.
-
Enable the Google Sheets API:
- With your project selected, go to APIs & Services on the left sidebar.
- Click on Library.
- In the search bar, type “Google Sheets API.”
- Click on the Google Sheets API from the results.
- Click the Enable button.
-
Create API Credentials:
- After enabling the API, click on Create Credentials.
- Choose API Key from the available options.
- The API Key will be generated – copy and save this key securely. You will use this key in your API calls within DashboardFox.
2. Prepare Your Google Sheet for API Access
-
Open Your Google Sheet:
- In your browser, navigate to your Google Sheet.
- You’ll see a URL similar to:
https://docs.google.com/spreadsheets/d/1IhI1C2SKHkH-dNVglzA_pTto2ItMA0R3iS7l-id5IAc/
-
Enable Public Sharing:
- Click on Share (usually located near the top-right).
- Set the sharing settings to “Anyone with the link can view.”
- Optionally, for security, you can restrict access by IP (for example, limit it to your server’s IP address) if your organization requires additional security.
-
Identify the Spreadsheet ID:
- In the example URL above, the spreadsheet ID is the portion between
/d/and/edit:- Spreadsheet ID:
1IhI1C2SKHkH-dNVglzA_pTto2ItMA0R3iS7l-id5IAc
- Spreadsheet ID:
- In the example URL above, the spreadsheet ID is the portion between
3. Construct and Test the API Call
-
Construct the API URL:
- The base URL for making API calls to the Google Sheets API is:
https://sheets.googleapis.com/v4/spreadsheets/ - Append the Spreadsheet ID (e.g.,
1IhI1C2SKHkH-dNVglzA_pTto2ItMA0R3iS7l-id5IAc). - Append
/values/followed by your worksheet name. For example, if your worksheet is titled “Spreadsheet Data,” URL encode it if necessary (spaces replaced with%20):- Worksheet Name:
Spreadsheet DatabecomesSpreadsheet%20Data
- Worksheet Name:
- Append the API key as a query parameter using
?key=followed by your generated API key.
Full Example API Call:
https://sheets.googleapis.com/v4/spreadsheets/1IhI1C2SKHkH-dNVglzA_pTto2ItMA0R3iS7l-id5IAc/values/Spreadsheet%20Data?key=YOUR_API_KEY- Replace
YOUR_API_KEYwith the actual API key you generated.
- The base URL for making API calls to the Google Sheets API is:
-
Verify the API Call Using Postman:
- Open Postman (or your favorite API testing tool).
- Create a new GET request and paste the constructed API URL.
- Send the request.
- Verify that the response contains the values from your Google Sheet. This confirms that the API is correctly connected to your spreadsheet.
-
Notes on Worksheet Names:
- The part after
/values/represents your worksheet name. If your worksheet has a different name, replaceSpreadsheet%20Datawith the URL-encoded version of your worksheet’s name.
- The part after
With these steps completed, you have successfully:
- Enabled the Google Sheets API on the Google Cloud Console.
- Configured your Google Sheet for public access (with optional IP restrictions).
- Constructed and tested an API call using Postman.
In the next part, we’ll cover how to add this API endpoint into DashboardFox and schedule routine fetches. Feel free to provide any additional details for the subsequent steps.
Part 2. Integrate the Google Sheets API with Yurbi
Follow these steps to add your API endpoint into Yurbi and schedule routine fetches. You can insert your screenshot after each step where indicated.
1. Add the API Connection in Yurbi
-
Log in as an Admin:
Navigate to Settings → Integrations → Manage API. -
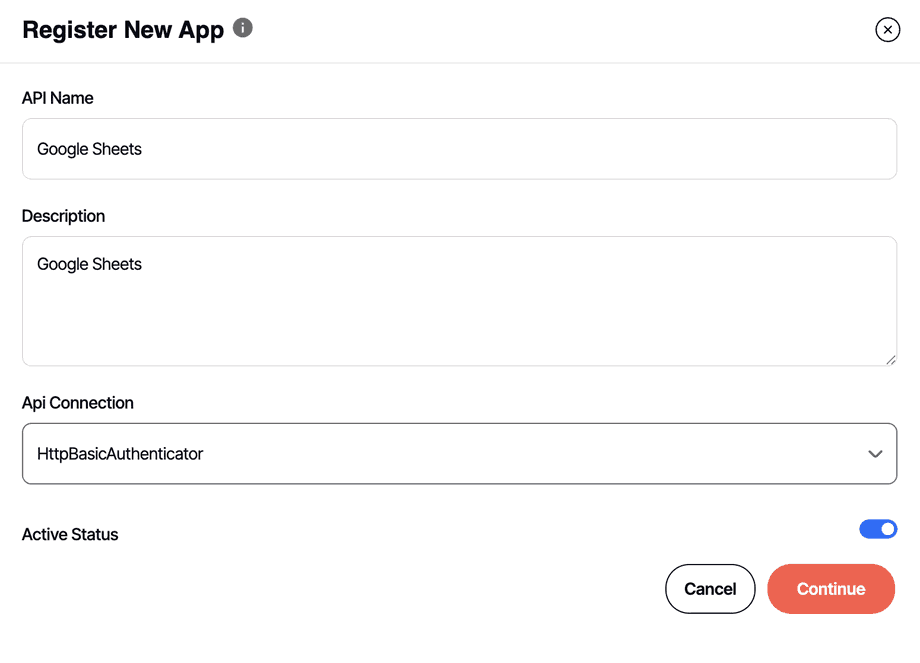
Create a New API Connection:
- Click the Create API button.
- Enter a descriptive name and description for the API connection.
- Select HttpBasicAuthenticator as the API Connection type.
- Click Continue.
-
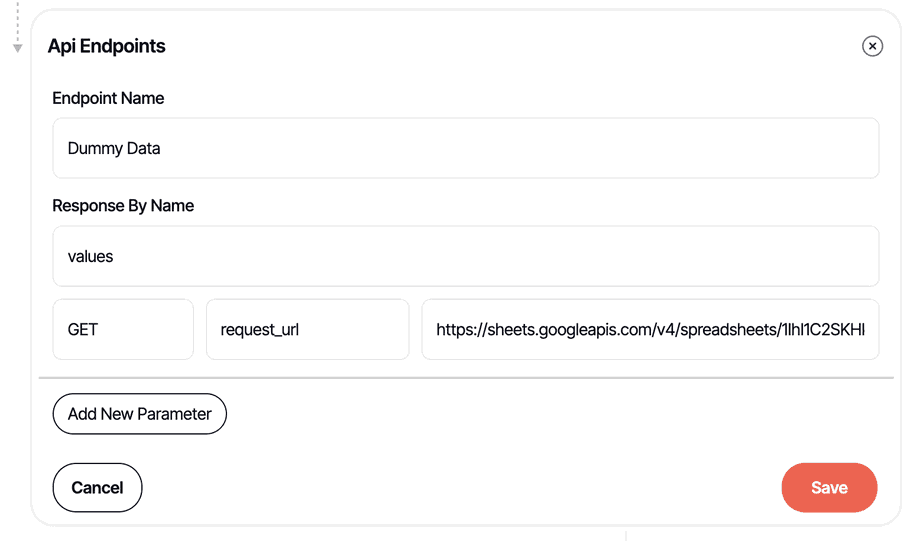
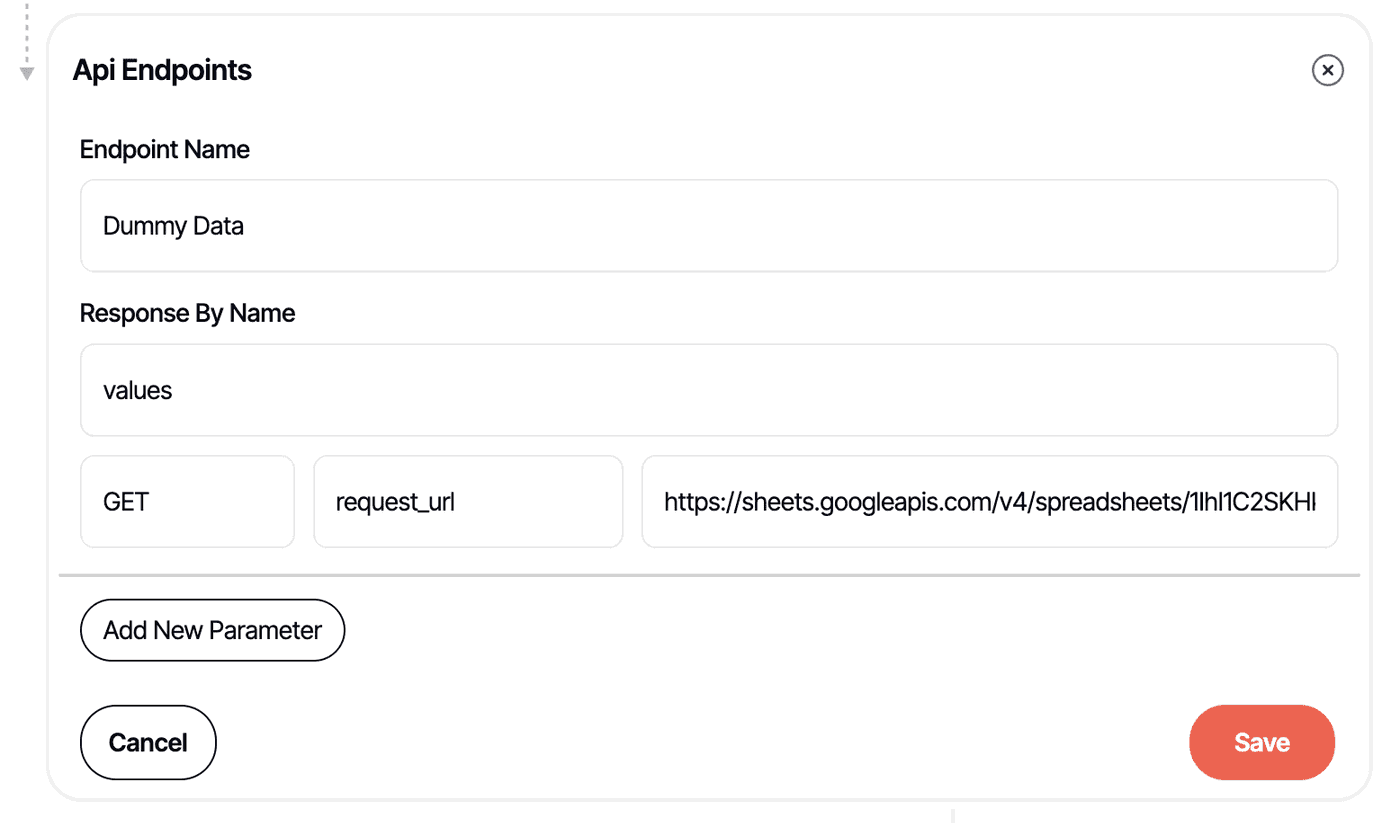
Add an Endpoint:
- Click Add Endpoint.
- Fill in the following details:
- Endpoint Name: (Recommended to use the worksheet name, e.g., “Dummy Data”)
- Response By Name: Enter “values”.
- For the API method configuration:
- Select GET.
- Paste
request_urlin the designated box. - Copy and paste the Google Sheets API call (created in Part 1) into the right-hand text box.
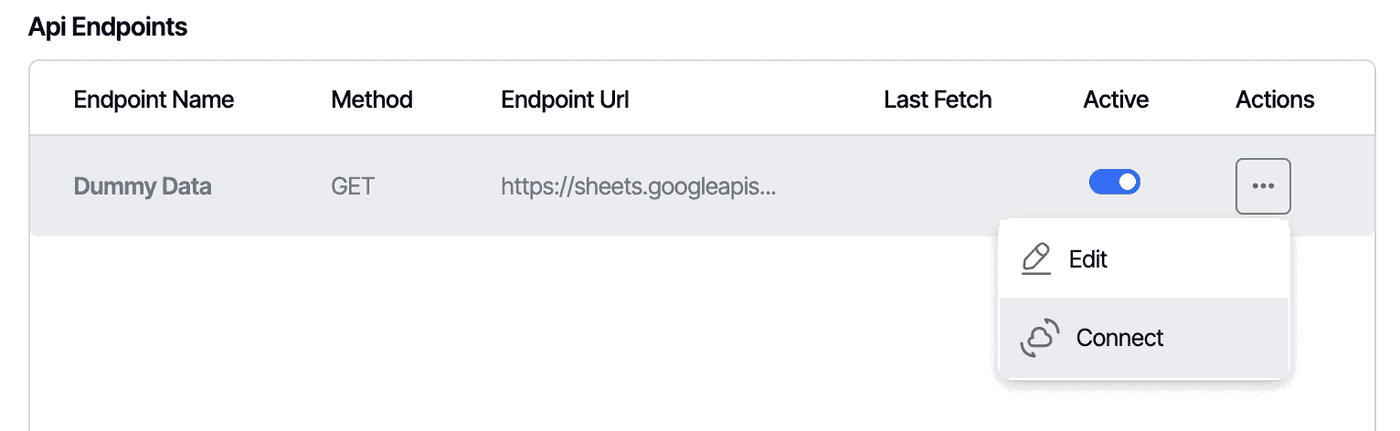
-
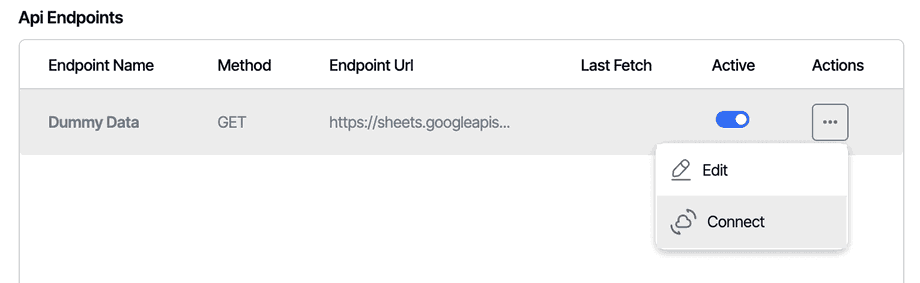
Save and Connect:
- Click Save.
- After saving, open the Actions dropdown for the newly added endpoint and select Connect.
- A green success message will confirm that the connection has been established successfully.
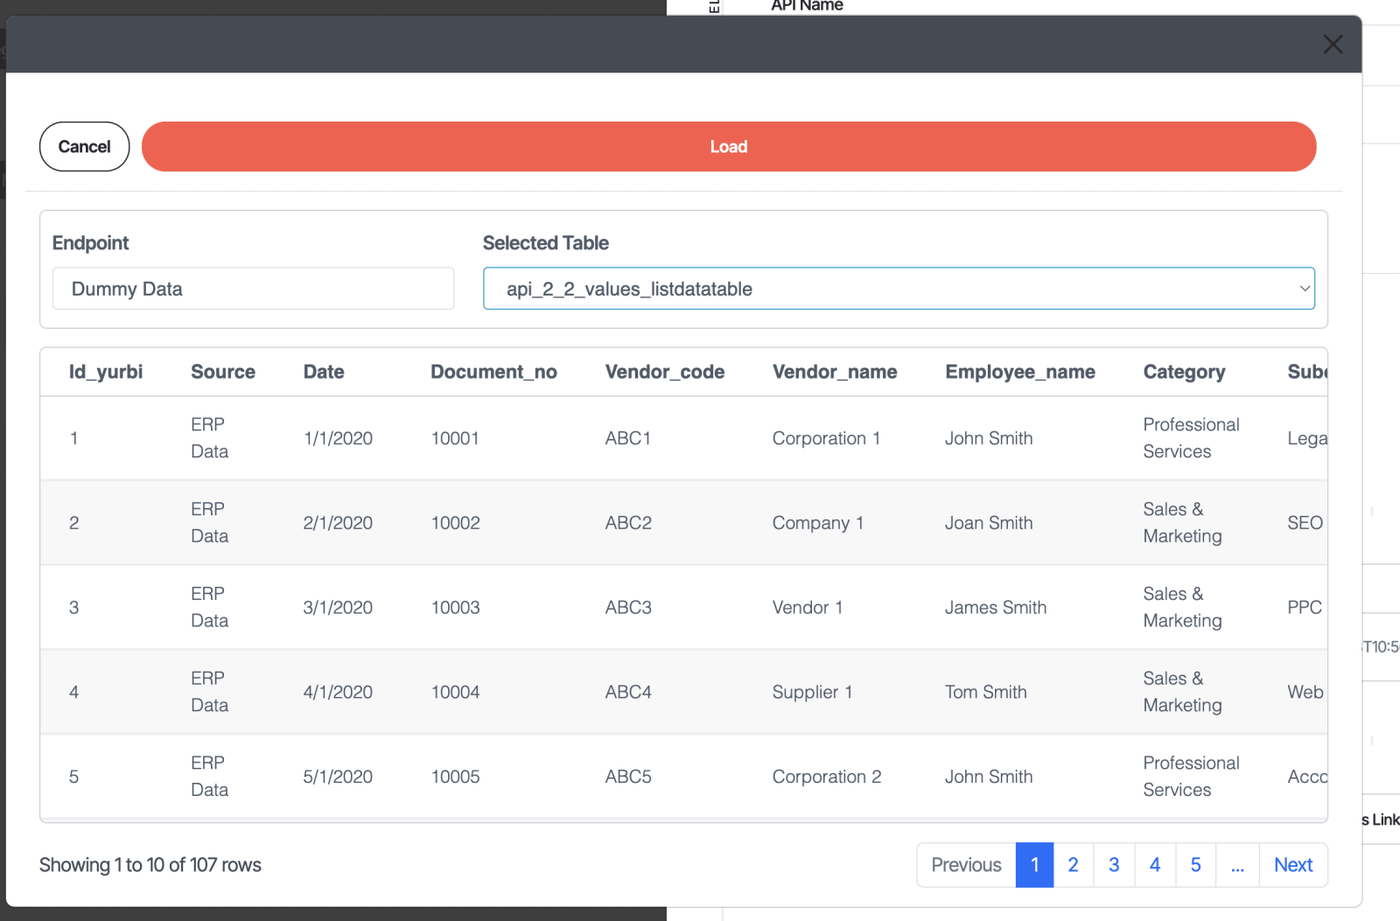
-
Verify the Data:
- From the Actions menu, select Preview to visualize the loaded data.
- On the Preview screen, make a note of the table name shown under Selected Table – it will appear in the format:
api_1_1_values_listdatatable - This table name is needed later when building your Yurbi reports.

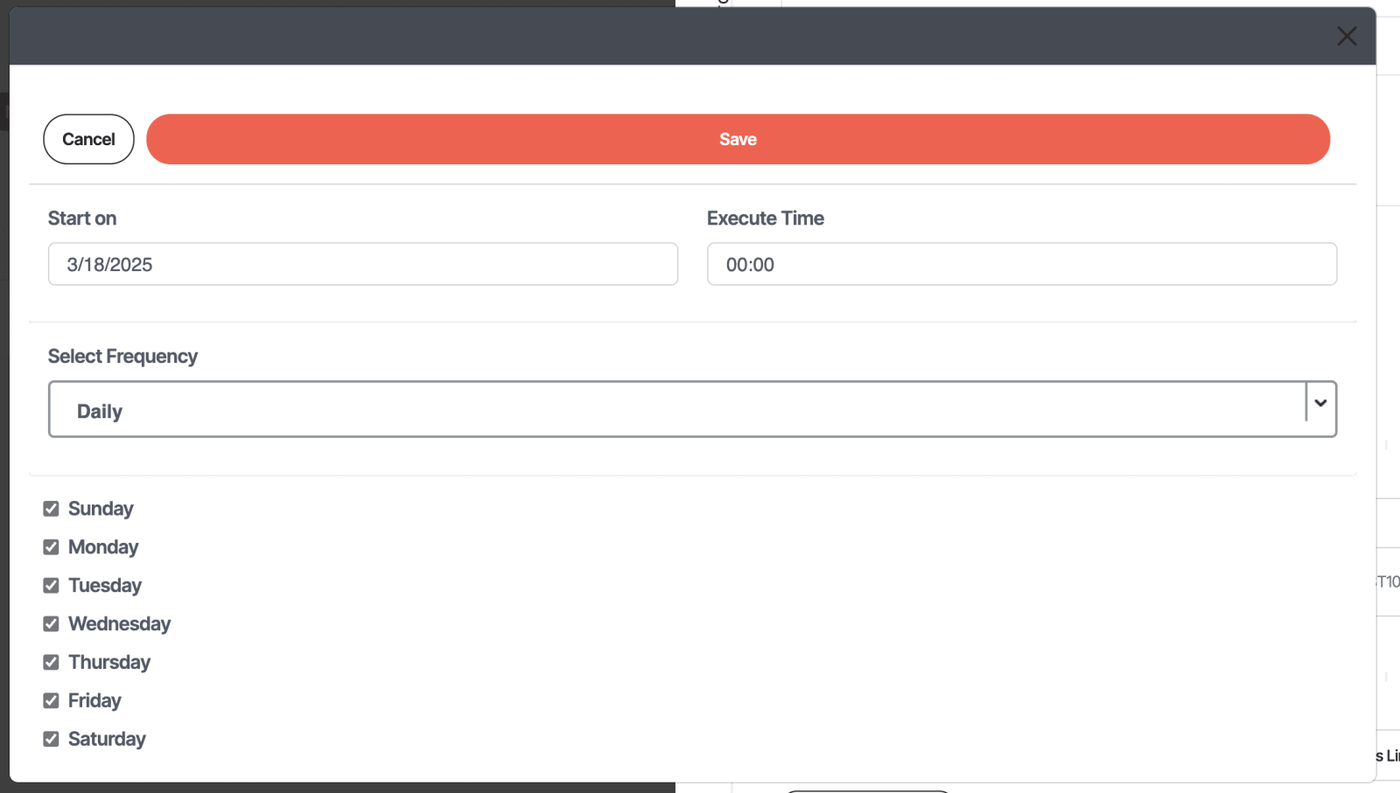
-
Manual and Scheduled Data Fetch:
- To manually refresh the data, choose Connect again from the endpoint’s Actions menu.
- To schedule automatic data fetches, follow these steps:
- From the Actions menu, select Schedule.
- Configure the schedule based on your desired frequency:
- If updating once a day, select the appropriate days of the week.
- For minute-based scheduling, enter the interval (we recommend a minimum of 15 minutes—for example, 60 minutes for an hourly fetch).
- Click Save to confirm the schedule.


2. Finalize the API and Database App Setup
-
Review API Endpoint Tables:
- Verify the latest data fetch by checking the API Endpoint tables in Yurbi.
- Verify the latest data fetch by checking the API Endpoint tables in Yurbi.
-
Create a New Database App:
- Navigate to Settings → Integrations and create a new App.
- Select Database App.
- The API connection stores data in one or more database tables (use the table name noted from the Preview step above).
-
Database Connection Details:
- The default settings for the Yurbi PostgreSQL backend database are as follows:
- Hostname: localhost
- User: postgres
- Password: yurbi (for Windows Server)
(For Linux, the default password is stored in/root/.passwords) - Database: yurbi
- The default settings for the Yurbi PostgreSQL backend database are as follows:
-
Assign Permissions:
- Assign appropriate permissions to the new App if other team members are involved in building or viewing reports.
- Assign appropriate permissions to the new App if other team members are involved in building or viewing reports.
-
Configure and Build the App:
- Navigate to the App Builder.
- Configure your new App by adding in the tables and defining joins as required—just as you would with any database source.
- This App will serve as your Yurbi PostgreSQL backend database for composing reports.