In here, we describe the procedure to perform a backup of Yurbi . It is important to do a backup of Yurbi including the Yurbi database because the database contains information such as report definitions, user provisioning, security profiles, and so on. Taking a backup helps you to restore the database anytime, in case any problem occurs with your system. The following steps are for Yurbi installed with a Microsoft SQL database backend. If you are using the PostgreSQL database option please follow these steps.
Performing a backup for Yurbi with Microsoft SQL Server database
Ensure that you are backing up the correct Yurbi database.
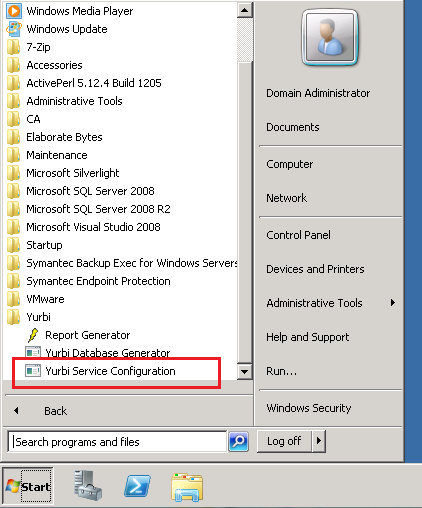
Log in to the application server and check the Service Configuration Panel
(Start --> All Programs --> Yurbi --> Yurbi Service Configuration)
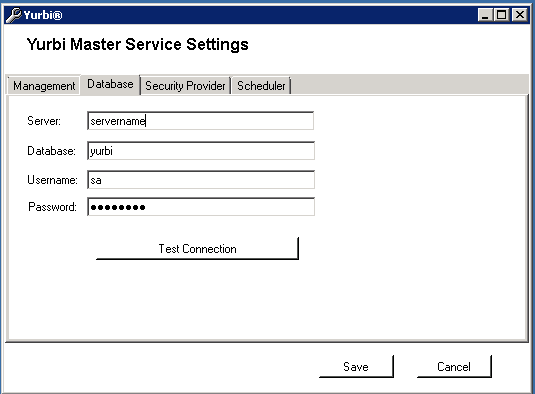
Inside the Service Config panel, please select the Database tab
Server: Represents the database server engine where the database is located
Database: Represents the name of the database that the installation is currently connected with
Username: Represents the SQL Authentication account that is used to read/write to the database
Password: SQL Authentication username password
Making the BackUp
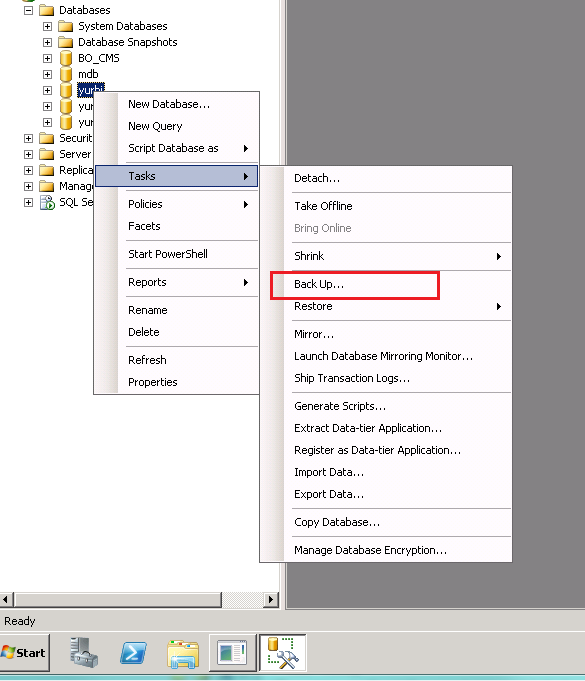
Using the Microsoft SQL Management Studio tool, please log in to the database engine where the Yurbi database is located
When you find the database (Right-Click --> Tasks --> Back Up...)
Ensure that you select a known location
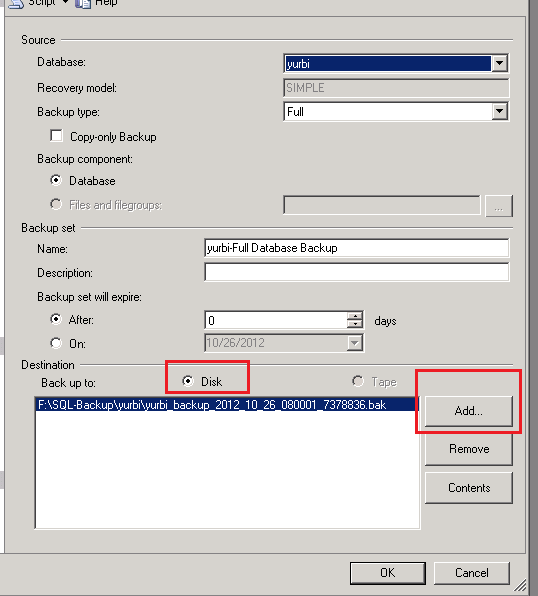
Under the options pane you will need to choose whether you are appending or overwriting
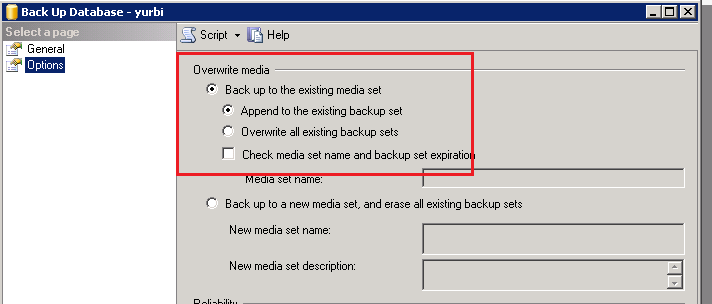
When you are all set, please click OK

Backing Up the Yurbi Directory
In addition to backing up the Yurbi database you also want to backup the Yurbi directory on the server where Yurbi in installed.
Go to C: > Program Files (x86) > yurbi.
Right-click the yurbi folder and select Copy.
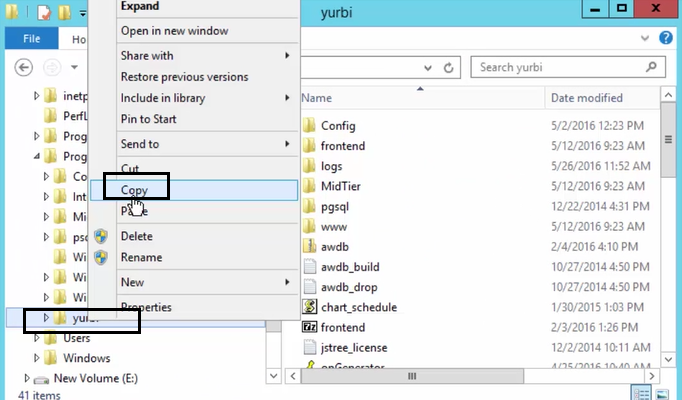
Paste the folder in any other location, other than the hard-drive. To paste the folder, right-click the location and select Paste.
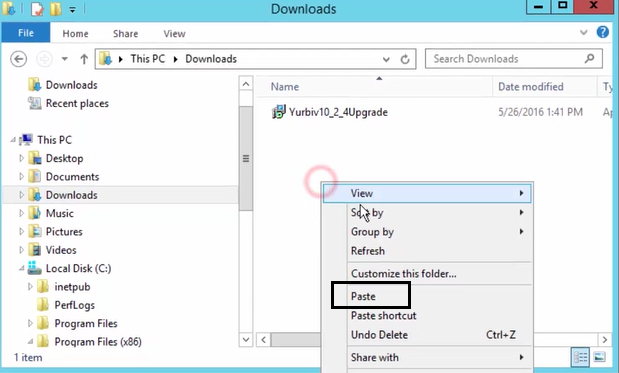
Note: If you are taking frequent backup, it is recommended to add the date of taking backup, in the folder name.